DIY: ARK Performance GT-F Lowering Springs Installation Guide

Bump. Are the install the same for the awd? All the installs directions I've seen are for the rwd.

See Post#18 section #5. The only difference you'll notice is the added drive shafts on the front of the car. It doesn't change the guide at all but does make reinstalling the strut assembly more annoying.
 
Can anyone provide the spring rating of the ARK springs versus the stock GT2AWD ratings, Please?
 
______________________________
Moderators: Should this thread be moved to the DIY section? I noticed today that there is no DIY for suspension install and I think this is a good one.
 
Moderators: Should this thread be moved to the DIY section? I noticed today that there is no DIY for suspension install and I think this is a good one.

Good idea, thx!
 
From interior to exterior to high performance - everything you need for your Stinger awaits you...
*phew* I searched all over for this thread, I knew I had commented on it, but y'all moved it to the DIY section! :confused::D
 
Can anyone who has installed these springs post an alignment spec sheet? Preferably a RWD Stinger?
 
We installed our Eibach's on my AWD GT today, and here a few notes that should be helpful for anyone attempting to do this themselves:

Front:
You will need to removed:
- sway bar drop link
- outer tie rod end (tap the side of the spindle with a hammer and the tapered stud will pop-out rather than resorting to a ball joint separator)
- brake caliper and the stand-off for the brake fluid line.
- the lower front locating link. Mine popped right out of the tapered receiver on the spindle
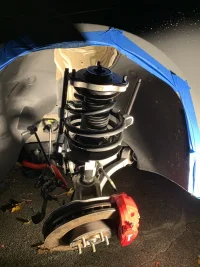
- there is a shield on the front of the strut that deflects air into the disc. remove it and the wheel speed sensor, allowing the front lower locating link to come upward past the axle shaft.

At this point, you should be able to tilt the strut outwards beyond the fender and remove the strut from the receiver on the spindle.

Rear:
Make sure the floor jack is under the lateral link rather than the rear spindle. Don't forget to uncouple the headlight height sensor linkage. Just remove the 2 bolts retaining the lower shock mount and the spindle. You'll be able to pull down the lateral link and remove/install the spring.

Is the lower front locating link the one that comes out perpendicular to the spindle? Also, was the reason for removing the caliper and brake line to account for additional movement provided by removing the locating link? I had one hell of a time getting the assembly out/in on my AWD yesterday and got stymied by the shit spring compressors I bought and ended up just reinstalling everything for now.
 
View attachment 13606

The nut towards the top of the strut is a tricky one. Grab your 17mm crescent wrench to hold the nut in place while you use a socket wrench with an Allen key to loosen the inner bolt. The link should slide out.

View attachment 13607
View attachment 13608

Unbolt the outer tier rod. First remove the holding pin. A 19mm is the used to remove bolt on steering knuckle. Grab the rotor at 3 and 9 o'clock and mimic left and right turns to loosen the outer tie rod bolt and then pull out.

View attachment 13609
View attachment 13610
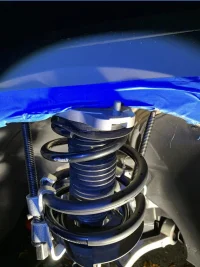
We found it safer, easier, and faster to leave the top hat on the vehicle as we remove the strut and spring assembly. Place spring compressors snuggly on the spring as you prepare for the next step. From the engine bay. unbolt the top nut from the strut by using a 19mm socket then tilt the strut and springs assembly towards you. Be mindful of the fender while you pull it out. Remove the top hat from the vehicle by using a 14mm socket to remove the three nuts that hold it in place.

View attachment 13611
View attachment 13612
View attachment 13613
We used a compressor to compress the spring before reinstalling the top hat. If you do not have a compressor, manual spring compressors must be used. Since we did not remove the brakes from the lower control arm one must carefully clear the fender upon reinstallation so as to not scratch the vehicle itself when replacing the strut with the newly installed spring.

View attachment 13614
View attachment 13615
And that's it! Please consult with your Kia Stinger expert on torque specs on all stock nuts and bolts.
Is alignment needed after intall?
 
______________________________
From interior to exterior to high performance - everything you need for your Stinger awaits you...
Installed my springs thanks to this guide.
Been on them for about 2 weeks (1K mi) now, very satisfied.

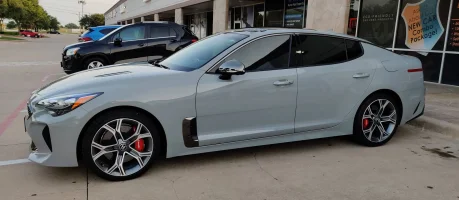
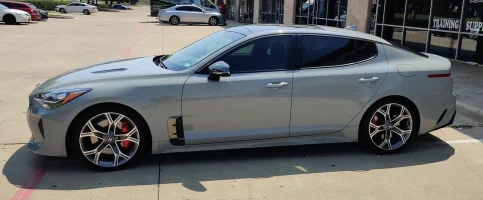
I didn't think to take any before and after pics, but I tried to reproduce a pic I had from before (I know, the angle isn't quite the same).
The drop is subtle, but it's just right in my opinion, and it's not so low it scrapes everywhere.

Before
IMG_20190627_200332.webp

After
IMG_20190907_141901.webp
 
Also to note, I didn't dislodge any tie rods or ball joints in my install on a RWD.
 
I have a GT2 AWD having a little trouble with clearing the last bolt of the top hat. Is there some kind of trick to turn the wheel right then push left? Whoever said there was resistance on the AWD wasn’t kidding lol. Any and all advice welcome. I installed both sway bars and the rear springs already .. I just want to drive again lol.
 

Attachments

  • 1C7F217A-221D-4B6A-A8C9-4C64615729C7.webp
    1C7F217A-221D-4B6A-A8C9-4C64615729C7.webp
    132.8 KB · Views: 82
  • 3D35E15D-22E0-4611-A950-A6F3DAE7656C.webp
    3D35E15D-22E0-4611-A950-A6F3DAE7656C.webp
    249.5 KB · Views: 84
I have a GT2 AWD having a little trouble with clearing the last bolt of the top hat. Is there some kind of trick to turn the wheel right then push left? Whoever said there was resistance on the AWD wasn’t kidding lol. Any and all advice welcome. I installed both sway bars and the rear springs already .. I just want to drive again lol.
Compress the spring some more until it clears. It's super tight tolerance and really annoying. You may have to relocate your compressor higher up on the spring coil.
 
From interior to exterior to high performance - everything you need for your Stinger awaits you...
I had the spring compressor higher on the top to get the top hat on but then the bars wouldn't allow me to fit into where the top hat goes. Is the compression just to get it into the wheel well and clear the fender then I can decompress it and move it freely?
 
______________________________
I had the spring compressor higher on the top to get the top hat on but then the bars wouldn't allow me to fit into where the top hat goes. Is the compression just to get it into the wheel well and clear the fender then I can decompress it and move it freely?
I forgot I had that issue too and you can’t compress from higher up. In the photo it looks like your right compressor could still go to the next coil and leave room.

I tightened it as much as I could and pushed down with as much force as I could until it cleared the fender and into position. A second set of hands could be helpful to move the strut while you push down.
 
Thread resurrection time...
Does anyone know where to find the correct torque settings for all this?
 
Thread resurrection time...
Does anyone know where to find the correct torque settings for all this?
I posted the specs I used in this thread. Haven’t had any issues since I did mine.
 
Passenger side front took me 2 hours. Total time: 6.5 hours. 5 hours to install the front and 1.5 hours for the rear.

To add to the above post about the front:

1. When reinstalling the strut assembly it helps to put a spring compressor on to give yourself some more clearance under the wheel arch.

2. The torx socket you need to hold the shock while tightening the top hat is a T10.

The torque specs I used were:
- Outer 19mm tie rod castle nut = 35 to 40 ft/lbs
- Lower 17mm strut bolt = 80 ft/lbs
- Top 17mm strut bolt (allen key bolt) = 80 ft/lbs
- 14mm strut mount nuts = 45 to 50 ft/lbs
- 19mm top hat nut = 30 to 40 ft/lbs. I was left with a 1/2 inch of thread exposed above the nut which is where the nut was prior to removal.
I totally missed this when I looked. Thanks man
 
From interior to exterior to high performance - everything you need for your Stinger awaits you...
Back
Top