Peeso33
Active Member
Why would they need to replace brake fluid at 20,000 km? Do you track your car?
The car lovers social network
Automotive components
Create videos that captivate
Automotive Hot or Not
Vehicle hacker protection
By enthusiasts, for enthusiasts
Advertise with us!
Timing is everything
Get the best deals on wheels!
Vehicle Specific Solutions
Brands you can trust
Promo code: REDLINE
Kia Hyundai Auto Racing
Authentic Tuning

It's part of the standard service procedure.Why would they need to replace brake fluid at 20,000 km? Do you track your car?
...as in the car turns on.... check!Maybe they get away with that by "visually inspecting" the results of a battery test.
Why would they need to replace brake fluid at 20,000 km? Do you track your car?
")

Swapped out the rear door handles with smart door handles. All wired up to the BCM, led lights and switch functional.

I'm hugely impressed with your achievement!
Is there already a wire from the rear door handle to inside the car? Or did you have to route the cable all the way from inside the door back to the BCM? I'd love to have the keyless-go button on my rear door handles but I'm hopeless with anything like modifying a car and I'm wondering if a car audio workshop might be able to route the cable back to the BCM for me.


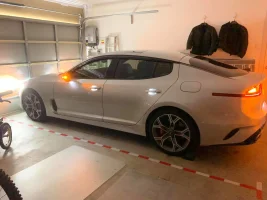
Nice. Is your black chrome wrapped.Today, I got some black accent stripes fitted down the sides. Really transforms the look of the car, and breaks up the slab of colour when viewed side on. The Black/Orange combo works well. Should have come from the factory like this. Credit to Zane at Innked Autostyling for his handiwork!
View attachment 37445 View attachment 37446 View attachment 37447 View attachment 37448
Yeah, the side vents would have looked a bit funny in the original chrome finish, so he wrapped them as well.Nice. Is your black chrome wrapped.
I LIKE IT... I also have the Neon Orange GT, mmmm might have to find me someone in Perth to do the same... Thanks for sharing @YummittmanToday, I got some black accent stripes fitted down the sides. Really transforms the look of the car, and breaks up the slab of colour when viewed side on. The Black/Orange combo works well. Should have come from the factory like this. Credit to Zane at Innked Autostyling for his handiwork!
View attachment 37445 View attachment 37446 View attachment 37447 View attachment 37448


I have been thinking of installing the same Mishimoto Catch Can since last year, it looks quite an easy install, I hope, as I also have watched Mishimoto's install video, keep us posted on how much it collects after so many kilometres, will look forward to see how effective it can be.Fitted a catch can today. Was super easy and only took about half an hour all up. It's the Mishimoto one, which although is not cheap, is a quality product. It came with everything, and it fitted up very easily. Also very easy to unscrew to clean out. Will keep an eye on it to see how much goop it catches!View attachment 38664 View attachment 38663
This is something I've been contemplating doing myself, it will be very interesting to see how much is collected from it, would it be possible to post a link to where you purchased it fromFitted a catch can today. Was super easy and only took about half an hour all up. It's the Mishimoto one, which although is not cheap, is a quality product. It came with everything, and it fitted up very easily. Also very easy to unscrew to clean out. Will keep an eye on it to see how much goop it catches!View attachment 38664 View attachment 38663
Got mine from eBay. Mishimoto have a presence there. You can also purchase direct from their website.This is something I've been contemplating doing myself, it will be very interesting to see how much is collected from it, would it be possible to post a link to where you purchased it from


You win some, you lose some I suppose. Eventually you come out on top though.This was a short lived affair which I shall put down as a live and learn experience.
The first lighted Led door catch plates were too small and very cheap looking so I sent them back and received a refund.
Sooo, I decided to get these door catch plates. I followed the " door catch plates " thread and took some time gently trying to bend them slightly so they would fit into the " pirate eye " plastic door plate that is originally in there.I used the door trim tool to get them out, used 3m double sided adhesive to stick them in and popped them back.
Today was warm and the car was sitting out in the sun for quite a few hours.When I closed my driver's side door I noticed the adhesive had come unstuck and the aluminium catch plate was rattling around in there. Got home checked all of them, all except one was loose.
Decided to take them off.
hubby had a slight smile on his face and I said " I know, it's I told you so moment isn't it ? "....
the catch plates Stinger wording is not engraved in they are small stinger stickers so maybe I should buy some small stickers instead
View attachment 39065 View attachment 39067 View attachment 39069


Nice! Quite the dab hand i see. Posting mine down soon lol.I painted my Engine cover with the help of hubby and I'm happy with the result.
View attachment 39540 View attachment 39541
Looks greatHad the third LED tail light installed today.
The OE remains and is non functional. I did have it removed but it then shows a gap in the rear window tint. So opted for it to be redunant.
Now I've have to say the quality of the finish is abhorrent, although i In expected it out of the box under room lighting I didn't pick up the shocking swirls and one big blemish. The auto electrician pointed it out and said under bright sun light it's more visible.
The light operates as a tail light and brake light no complaints there, thankfully the electrician did the install he said the three wires were not colour coordinated and he had to thread them through the rubber and down through a grommet. Not something I could have done. View attachment 17883 View attachment 17884 View attachment 17885 View attachment 17886 View attachment 17887 View attachment 17888