3D Printed Snorkel Swap

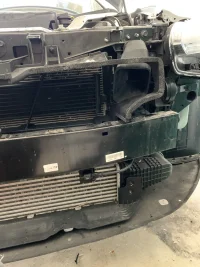
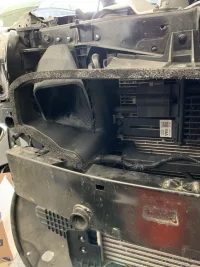
I think to see the most HP gains from this you would need to either run the full stock airbox (top and bottom) with maybe something like the K&N drop-in filters.

Or somehow enclose your CAI filters so that the incoming air wouldn't have anywhere to go besides into the intake (which is why I'm working on printing a partial top for my airbox).

For now, since I am only using the bottom half of the air box, I'm probably not creating much positive pressure, but I am letting some much needed cool air into my engine bay. I haven't really looked at my logs from before and after because I was also doing other things that would affect performance. Hopefully some of you guys can help us out with that since you'll be getting some soon.
 
As an overall update, the weather is looking good for me to be able to pull the front off and get some pictures. Maybe if I get a helper I can even give you guys a video of how to put them in.

For those who are waiting for a set, I am going to make sure your copies are printed and ready to go before anyone pays for them. If all goes well I should be able to start sending them out sometime next week.

Here's a look at a finished duct with the smoother finish (in PLA still).

00100lrPORTRAIT_00100_BURST20200214194638325_COVER.webp
 
As an overall update, the weather is looking good for me to be able to pull the front off and get some pictures. Maybe if I get a helper I can even give you guys a video of how to put them in.

For those who are waiting for a set, I am going to make sure your copies are printed and ready to go before anyone pays for them. If all goes well I should be able to start sending them out sometime next week.

Here's a look at a finished duct with the smoother finish (in PLA still).

View attachment 38095
Looks really nice
 
______________________________
Here is a write up of how I installed my 3D printed cold air ducts. This is not an official Kia design so definitely do this at your own risk! If you’re not confident in your own handiwork, have a mechanic do it for you.


Ok, the disclaimer is out of the way.


Materials: Flat head screw driver, needle nose pliers, 10mm socket and wrench, 4” socket extension, 8” socket extension, Dremel with a plastic cutting wheel (or a heavy duty box cutter), body clip tool (optional, but really helpful)

Time: ~2 hours


1. Remove the bumper cover. I followed the Agency intercooler install guide when I did mine the first time, but I'm sure there are some other great write ups out there. If anyone knows of a good one let me know and I can include it here. Just take your time on this part so you don't scratch your paint.

2. Remove the four screws and 2 nuts holding the radiator baffle on. You want to leave the baffle in place for the moment so that you can mark where you need to cut. You can leave the wire loom connected to the baffle for now.

3. Remove the stock snorkels. Each snorkel is held on by three 10mm bolts.
IMG_20200216_155600.webp

4. Remove the rubber seals from the stock snorkels and attach them to the new ducts. They will only attach correctly when the seals are positioned with the letter facing up (L for driver side, R for passenger side). Use a flat head screw driver to push down on the seal to make sure the teeth fit over the notches snugly. Using one of the bolts you removed with the stock snorkel, mount the new ducts, but don’t tighten the bolts down all the way yet.
IMG_20200216_104338.webp
MVIMG_20200216_160604.webp

5. With the ducts mounted, position the baffle where it will be once everything is tightened down and then use a grease pen or box cutter to mark the back of the baffle where the duct meets it so that you will know where to cut.

6. Remove the ducts.

7. Using your pliers and flat head, carefully pull out the plastic snaps hold the wire loom to the baffle. There should be one large snap on each side of the baffle, and then 4 or 5 along the front. Remove the baffle.

8. Using your Dremel or box cutter, cut out an opening on each side of the baffle where you drew your outline. I definitely did not do a great job at this part. Take your time and double check your marks and I’m sure you can make this look clean.
IMG_20200216_160041.webp

9. Once you have the holes cut the way you want them, reinstall the baffle, but don’t tighten down the bolts yet. Install the new ducts and tighten down the bolts (not too tight or you will crack the plastic). Once you have the ducts mounted, bolt down the baffle and reconnect the wire loom.
MVIMG_20200216_161031.webp

10. Replace the bumper cover.

MVIMG_20200216_172223.webp
 
Here is a write up of how I installed my 3D printed cold air ducts. This is not an official Kia design so definitely do this at your own risk! If you’re not confident in your own handiwork, have a mechanic do it for you.


Ok, the disclaimer is out of the way.


Materials: Flat head screw driver, needle nose pliers, 10mm socket and wrench, 4” socket extension, 8” socket extension, Dremel with a plastic cutting wheel (or a heavy duty box cutter), body clip tool (optional, but really helpful)

Time: ~2 hours


1. Remove the bumper cover. I followed the Agency intercooler install guide when I did mine the first time, but I'm sure there are some other great write ups out there. If anyone knows of a good one let me know and I can include it here. Just take your time on this part so you don't scratch your paint.

2. Remove the four screws and 2 nuts holding the radiator baffle on. You want to leave the baffle in place for the moment so that you can mark where you need to cut. You can leave the wire loom connected to the baffle for now.

3. Remove the stock snorkels. Each snorkel is held on by three 10mm bolts.
View attachment 38161

4. Remove the rubber seals from the stock snorkels and attach them to the new ducts. They will only attach correctly when the seals are positioned with the letter facing up (L for driver side, R for passenger side). Use a flat head screw driver to push down on the seal to make sure the teeth fit over the notches snugly. Using one of the bolts you removed with the stock snorkel, mount the new ducts, but don’t tighten the bolts down all the way yet.
View attachment 38162
View attachment 38163

5. With the ducts mounted, position the baffle where it will be once everything is tightened down and then use a grease pen or box cutter to mark the back of the baffle where the duct meets it so that you will know where to cut.

6. Remove the ducts.

7. Using your pliers and flat head, carefully pull out the plastic snaps hold the wire loom to the baffle. There should be one large snap on each side of the baffle, and then 4 or 5 along the front. Remove the baffle.

8. Using your Dremel or box cutter, cut out an opening on each side of the baffle where you drew your outline. I definitely did not do a great job at this part. Take your time and double check your marks and I’m sure you can make this look clean.
View attachment 38164

9. Once you have the holes cut the way you want them, reinstall the baffle, but don’t tighten down the bolts yet. Install the new ducts and tighten down the bolts (not too tight or you will crack the plastic). Once you have the ducts mounted, bolt down the baffle and reconnect the wire loom.
View attachment 38165

10. Replace the bumper cover.

View attachment 38166
Great job, nice step by step instructions and thanks for sharing this awesome DIY mod.:thumbup:
 
From interior to exterior to high performance - everything you need for your Stinger awaits you...
Oh man I've got 101 questions but I'll try and restrain myself:

What material did you use for the final print? (I'm guessing ABS)

Did you coat the final model with any sort of protective sealer/epoxy?

What printer did you use?
 
Oh man I've got 101 questions but I'll try and restrain myself:

What material did you use for the final print? (I'm guessing ABS)

Did you coat the final model with any sort of protective sealer/epoxy?

What printer did you use?

I have them in ABS and PLA. The ones in the write-up are PLA since that was the only filament I have in blue at the moment.

No sealer or anything, but that's not a bad idea. The black PLA ones that I've had in the car the last 6 months look good as new, but they were prototypes and printed with draft settings for speed. I'm actually surprised they held up so well.

The printer is an Anet A8, but I've upgraded so much of it at this point that its basically its own thing.

3 down, 98 to go haha

Your 3D printed PLA parts lasted 6 months bolted to your stinger??? :eek: Must be some quality filament, my PLA coat hooks didn't make it a month. I have to use ABS & PETG.

Everything else is standard dork stuff :geek:: What modeling software? Slicer? Wall/Infill/temp settings? Other 3D stinger mods?
 
For those that are waiting for a paypal invoice, I am waiting to make sure your part is printed and ready before I ask anyone for money.

Aannnd....I ran into some issues printing these in ABS so it is taking a little longer than expected. Just to give everyone an idea, it takes about 10 hours to print a pair of these (when everything goes right). I believe my printing issue is resolved, but I am running a few tests copies to make sure it all looks good. Sorry for the delay, everyone!


Just got mine! I’ll install them next week!
 
______________________________
From interior to exterior to high performance - everything you need for your Stinger awaits you...
Awesome! Let me know what you think once you get them on.
 
Bad news :cry:....

My printer went up in flames yesterday so there its going to be a bit longer before I can get these out to you guys. The new printer should be here next Friday, but they haven't sent me a tracking number yet so I'm not so sure if that date was accurate. I'll keep you guys posted on a timeline for when I can start printing again.

The good news though is that the new printer (Ender 5 Plus) is quite an upgrade over the last one :cool:. Hopefully that translates into faster/better prints. Oh, and less fires.
 
What printer did you have? Wire failure at the heated bed?
 
Anet A8, and from what I could tell the heater cartridge came out of the hotend. I was using the version of marlin with thermal runaway safeties but in, but I also had an upgraded power supply pushing 13+ volts. My guess was the 60 seconds lag time that it takes for thermal runaway to trigger was enough time for the cartridge to Chernobyl on me.
 
Ouch, that sucks. Sorry to hear that.
I imagine you know that almost none of Creality's printers have thermal runaway enabled.

Tiny Machines had a preset and tuned marlin version available for my printer, CR 10S Pro, which was helpful.
 
From interior to exterior to high performance - everything you need for your Stinger awaits you...
I guess that is why people say don't leave your printer running and walk away.
 
______________________________
Bad news :cry:....

The good news though is that the new printer (Ender 5 Plus) is quite an upgrade over the last one :cool:. Hopefully that translates into faster/better prints. Oh, and less fires.

Sorry to hear that! I just picked up an Ender 3 Pro yesterday and am excited to start printing out dumb shit! haha. Hopefully no fires though!!
 
hope you' ll be able to fix it ... can't wait for the production to ramp up :geek::geek: Exciting to make my purchase !
 
Just got mine on! Nice job @Hyperjetta they look nice and seem sturdy. The only part that took some time was trimming the radiator shroud so the snorkels fit in
 

Attachments

  • 28E18914-F71B-4A3C-BF0A-46E56DB01FD7.webp
    28E18914-F71B-4A3C-BF0A-46E56DB01FD7.webp
    253.5 KB · Views: 111
  • 4BB1488D-BE77-430B-96CD-62ACD039B7AD.webp
    4BB1488D-BE77-430B-96CD-62ACD039B7AD.webp
    224.4 KB · Views: 111
  • 597A9AC6-69ED-430B-BD98-120ED69308D8.webp
    597A9AC6-69ED-430B-BD98-120ED69308D8.webp
    221.1 KB · Views: 110
From interior to exterior to high performance - everything you need for your Stinger awaits you...
Back
Top