Duce_13
STL Stinger Club
The car lovers social network
Automotive components
Create videos that captivate
Automotive Hot or Not
Vehicle hacker protection
By enthusiasts, for enthusiasts
Advertise with us!
Timing is everything
Get the best deals on wheels!
Vehicle Specific Solutions
Brands you can trust
Promo code: REDLINE
Kia Hyundai Auto Racing
Authentic Tuning

Wow, I actually really like the blue badge up front. I may do that. I like it a lot more than the "E" badge.Today I took the plunge and attempted my first ever de-badge/ re-badge. I learned a few things.
1) A hair dryer seems to provide enough heat so I erred on that side instead of using a heat gun.
2) I chose to primarily use fishing line with plastic wedges for support. 10# test line kept breaking, but 20# test worked.
3) The fishing line will cake with badge adhesive, and this I believe is what created a scuff above the rear center badge. I'll need to do a tiny bit of touching up--nothing too bad, thank goodness.
4) Fishing line is cheap. Don't re-use it once it cakes.
5) DUNCE LIGHT BULB: I attacked the front badge last, mostly because I was leery of even doing it based on some results posted elsewhere on the forum. But as I was wiping off the Goo-Gone from my hands after wiping off the adhesive, I had the bright idea to USE IT AS LUBRICANT while "sawing" with the fishing line. FAR less scratches in the clear coat, and using it keeps the adhesive previously sawn through from RE-attaching to the body.
Some pics:
View attachment 4302 View attachment 4303View attachment 4304
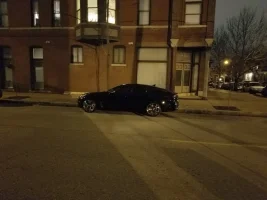
Looking a little ................gangster !Took it out for a stroll tonight

Great job, that looks awesome!Today I took the plunge and attempted my first ever de-badge/ re-badge. I learned a few things.
1) A hair dryer seems to provide enough heat so I erred on that side instead of using a heat gun.
2) I chose to primarily use fishing line with plastic wedges for support. 10# test line kept breaking, but 20# test worked.
3) The fishing line will cake with badge adhesive, and this I believe is what created a scuff above the rear center badge. I'll need to do a tiny bit of touching up--nothing too bad, thank goodness.
4) Fishing line is cheap. Don't re-use it once it cakes.
5) DUNCE LIGHT BULB: I attacked the front badge last, mostly because I was leery of even doing it based on some results posted elsewhere on the forum. But as I was wiping off the Goo-Gone from my hands after wiping off the adhesive, I had the bright idea to USE IT AS LUBRICANT while "sawing" with the fishing line. FAR less scratches in the clear coat, and using it keeps the adhesive previously sawn through from RE-attaching to the body.
Some pics:
View attachment 4302 View attachment 4303View attachment 4304
It's good to get some exercise.Took it out for a stroll tonight

 So I had my windows tinted this week in my new Stinger. Here is what they posted on FB and Instagram after they were done. It looks great!
One thing to add: when I was changing my badges, I was way too rough on the first badge and left some swirls from the spudger tool. Use masking tape. Lay it all around the badge so that the fishing line and whatever prying tool you use will not make contact with the paint. I also stuck a microfiber towel underneath the wedging tool and basically wedged it under the badge for support.
") I will add that tape around the badge is a GREAT idea and that along with lubricating the under area with Goo-Gone and PATIENCE it will hopefully result in a seamless changeover!
I will add that tape around the badge is a GREAT idea and that along with lubricating the under area with Goo-Gone and PATIENCE it will hopefully result in a seamless changeover!One thing to add: when I was changing my badges, I was way too rough on the first badge and left some swirls from the spudger tool. Use masking tape. Lay it all around the badge so that the fishing line and whatever prying tool you use will not make contact with the paint. I also stuck a microfiber towel underneath the wedging tool and basically wedged it under the badge for support.
Did you fill in the holes with anything or did you just cover them with the new badges? Looks great by way!
My US model has that as well on the front. The OEM "Kia Motors" badge I used on mine wasn't a match for the top 2 holes either, despite the oval hole providing some lateral play in placement. Speaking of, does anyone know which specific Korean spec models use(d) that badge? It came sealed in a factory stamped and coded bag, but no clue as to vehicle(s) of origin...I filled the rear holes with silicone as suggested by StingerGT&Me's vid. The front holes is unnecessary cause the E badges have posts that will slot in.
Here's a fun (and unproven) fact: the Canadian Stingers don't have 2 circular holes on the front and back. Instead there's one circular hole (on the right) and one oval shaped hole (on the left). Doesn't impact anything but when lining up the stinger script on the back, you'll need to be extra careful to cover up the oval hole.

Here's a fun (and unproven) fact: the Canadian Stingers don't have 2 circular holes on the front and back. Instead there's one circular hole (on the right) and one oval shaped hole (on the left).
US cars are the same in the rear.
Today I took the plunge and attempted my first ever de-badge/ re-badge.