You are using an out of date browser. It may not display this or other websites correctly.
You should upgrade or use an alternative browser.
You should upgrade or use an alternative browser.
2.5T Intake?
- Thread starter andybob
- Start date
K8 Stinger Store
Authorized Vendor
We have just added this to our site, and it’s now available to pre-order.
2022-2023 Kia Stinger 2.5T - Injen Short Ram Air Intake System
You can use discount code STINGER-FORUM-2024 at checkout to see the discount applied.
We are also selling it with the optional hydroshield available to get with the intake.
2022-2023 Kia Stinger 2.5T - Injen Short Ram Air Intake System
You can use discount code STINGER-FORUM-2024 at checkout to see the discount applied.
We are also selling it with the optional hydroshield available to get with the intake.
______________________________
Volfy
1000 Posts Club!
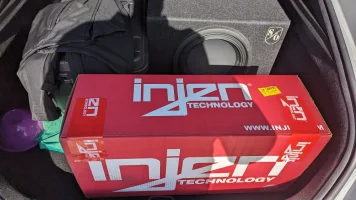
You and your California address...Fresh arrival View attachment 84563
Mine is inside a FedEx trailer somewhere on I-10.
socalvn
Stinger Enthusiast
- Joined
- Feb 9, 2022
- Messages
- 888
- Reaction score
- 410
- Points
- 68
Yep. But im at 28500 on millage and going to do my 30k service first before installYou and your California address...
Mine is inside a FedEx trailer somewhere on I-10.
From interior to exterior to high performance - everything you need for your Stinger awaits you...
Mrakifa
Member
- Joined
- May 4, 2021
- Messages
- 31
- Reaction score
- 43
- Points
- 18
Mine will be here tomorrowSounds like they shipped out a whole batch today. Mine will be here Thursday... Just in time for install before the 2day AutoX weekend.
Volfy
1000 Posts Club!
Mine arrived yesterday, and I had just enough daylight left to drop it in. Package was well packed.
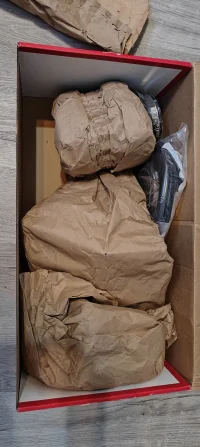
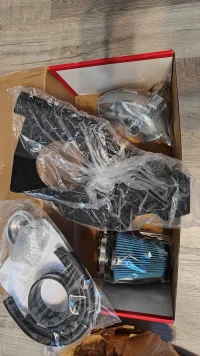
I broke my own cardinal rule of never working on a dirty car. Normally, I would've washed the engine bay squeaky clean before starting. But... 2-day AutoX coming up this weekend and I really wanted this thing installed, so... I tried to be extra extra careful not to let dust & debris into the intake track.
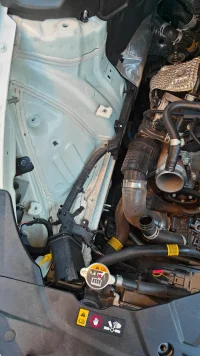
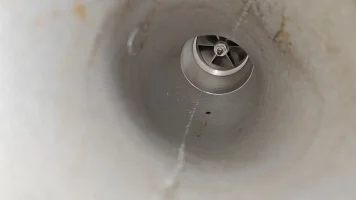
With the stock intake removed, it's a perfect time to inspect the whirly bird. Excellent shape, with sharp blades, as expected.
Removing the stock intake wasn't too difficult. Kia went with a spring clip on the intake adapter, which is good and bad. Very easy to R&R, but the Injen kit does not come with a spring clip, so it requires removal from the stock adapter to put on theirs. Turns out not too difficult, so I'll give them a pass.
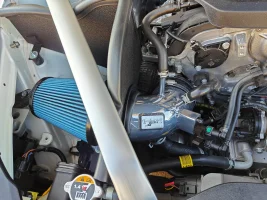
As with the 2.0T kits I installed on both our G70 and Stinger, my biggest gripe is the fit of the heat shield. There are crevasses all along the edges to let hot underhood air in. It is easily remedied by sealing those crevasses with insulation sheet, and I can understand them having to keep the cost of mfr reasonable. At least they do provide a heat shield, unlike their 3.3T kits, which I struggle to call a COLD AIR intake.
One thing they did improve over the 2.0T kit is raising the wall height to be much closer to the underside of the hood. That should help reduce hot underhood air from intruding into the "air box". One added benefit - at least for me - is that better partitioning also cuts down on turbo woosh noise. I'm sure lots of folks love the turbo noises but, personally, I don't need to hear my turbos to know they are working. Anyhow, the heat shield might be done a bit better, but it is still not up to my standards. I will be installing a top cover plate, similar to what I did for the 2.0T kits. I just love modifying the modification.
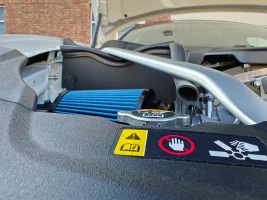
Here you can see the fit is mediocre at best. Again, nothing that some extra insulation couldn't improve. But quite honestly, if you are looking for a true out-of-the-box CAI kit, I'd highly recommend the aFe Takeda kit instead.
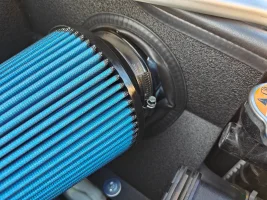
Zero attempt at sealing against hot radiator air blowing into the "airbox". I will be fitting baffle plate form-fitted around the stock inlet port.
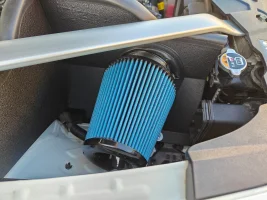
All that said, I knew full well this was going to be case with the Injen, and I still decided to cancel my aFe Takeda CAI order and buy this Injen instead... for a single reason: ease of modification for potential performance gain. With the aFe, the well-executed airbox is great for ease of install and for true cold air induction. However, it would be next to impossible to stuff a larger air filter into their box, and you are stuck with sucking cold air through a straw (the stock air inlet). Once I'm done sealing the Injen Swiss cheese of a heat shield, it will draw cold air from not only the stock air inlet but also the large volume inner fender, which is well protected. I've already ordered a larger K&N filter, based on my measurements of the injen kit, as installed.
Stay tuned.


I broke my own cardinal rule of never working on a dirty car. Normally, I would've washed the engine bay squeaky clean before starting. But... 2-day AutoX coming up this weekend and I really wanted this thing installed, so... I tried to be extra extra careful not to let dust & debris into the intake track.

With the stock intake removed, it's a perfect time to inspect the whirly bird. Excellent shape, with sharp blades, as expected.

Removing the stock intake wasn't too difficult. Kia went with a spring clip on the intake adapter, which is good and bad. Very easy to R&R, but the Injen kit does not come with a spring clip, so it requires removal from the stock adapter to put on theirs. Turns out not too difficult, so I'll give them a pass.

As with the 2.0T kits I installed on both our G70 and Stinger, my biggest gripe is the fit of the heat shield. There are crevasses all along the edges to let hot underhood air in. It is easily remedied by sealing those crevasses with insulation sheet, and I can understand them having to keep the cost of mfr reasonable. At least they do provide a heat shield, unlike their 3.3T kits, which I struggle to call a COLD AIR intake.
One thing they did improve over the 2.0T kit is raising the wall height to be much closer to the underside of the hood. That should help reduce hot underhood air from intruding into the "air box". One added benefit - at least for me - is that better partitioning also cuts down on turbo woosh noise. I'm sure lots of folks love the turbo noises but, personally, I don't need to hear my turbos to know they are working. Anyhow, the heat shield might be done a bit better, but it is still not up to my standards. I will be installing a top cover plate, similar to what I did for the 2.0T kits. I just love modifying the modification.

Here you can see the fit is mediocre at best. Again, nothing that some extra insulation couldn't improve. But quite honestly, if you are looking for a true out-of-the-box CAI kit, I'd highly recommend the aFe Takeda kit instead.

Zero attempt at sealing against hot radiator air blowing into the "airbox". I will be fitting baffle plate form-fitted around the stock inlet port.

All that said, I knew full well this was going to be case with the Injen, and I still decided to cancel my aFe Takeda CAI order and buy this Injen instead... for a single reason: ease of modification for potential performance gain. With the aFe, the well-executed airbox is great for ease of install and for true cold air induction. However, it would be next to impossible to stuff a larger air filter into their box, and you are stuck with sucking cold air through a straw (the stock air inlet). Once I'm done sealing the Injen Swiss cheese of a heat shield, it will draw cold air from not only the stock air inlet but also the large volume inner fender, which is well protected. I've already ordered a larger K&N filter, based on my measurements of the injen kit, as installed.
Stay tuned.
Last edited:
Volfy
1000 Posts Club!
Not bad at all. The spring C-clip on the stock intake adapter took a bit of studying to figure out how to remove properly. Injen's downloaded instructions didn't go into details on that. But it wasn't that difficult. Everything else is pretty standard affairs, no different than any other CAI.How was the install?
Also, Injen included an M6 bolt for securing the EVAP assembly. I ended up reusing the stock hex flange-head bolt and it fitted perfectly (see pic above, to the right of the "injen" logo). I'm not sure why Injen bothered including the M6 hex-socket-head bolt. To use that one, it would needed a thick study washer, but none was provided.
Volfy
1000 Posts Club!
Replacement K&N filter came in. It was almost perfect. I knew it was a fraction of an inch longer and would most likely require a bit of trimming to fit, so I gambled on it... and that turned out to be true. However, the end result is well worth it. The ability to do exactly THIS is why I went with the Injen, instead of aFe.
By itself, the blue Injen filter is already oversized, having considerably more sq.in. surface area than the stock waffle filter. That's how they were able to dyno 20HP gain. Next to the K&N, however, it no longer looks so impressive.
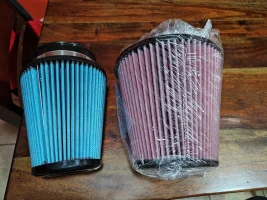
The substantially larger diameter is really what matters.
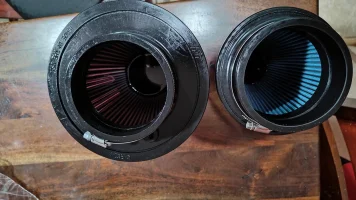
Alas... if only it was 1/2" shorter. This is where a guy needs to decide how comfortable he is with modifying his car. I myself did not think twice about hacking into that grey plastic headlight aiming adjustment guide. However, I can see not everyone feels the same.
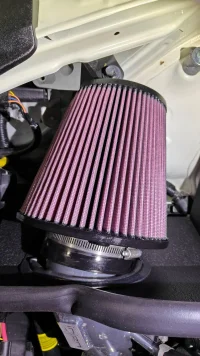
5mins and a bit of, uh... clearancing, later. Voila! Shoehorned in there like it was meant to be all along.
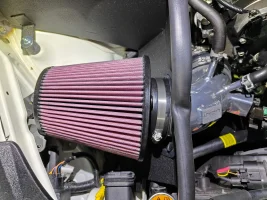
Even has enough overhead clearance for adding the top cover plate I plan on adding (next step).
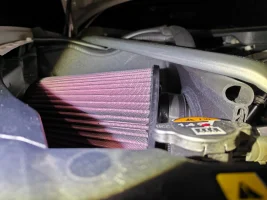
The saga continues...
By itself, the blue Injen filter is already oversized, having considerably more sq.in. surface area than the stock waffle filter. That's how they were able to dyno 20HP gain. Next to the K&N, however, it no longer looks so impressive.

The substantially larger diameter is really what matters.

Alas... if only it was 1/2" shorter. This is where a guy needs to decide how comfortable he is with modifying his car. I myself did not think twice about hacking into that grey plastic headlight aiming adjustment guide. However, I can see not everyone feels the same.

5mins and a bit of, uh... clearancing, later. Voila! Shoehorned in there like it was meant to be all along.

Even has enough overhead clearance for adding the top cover plate I plan on adding (next step).

The saga continues...
Last edited:
______________________________
From interior to exterior to high performance - everything you need for your Stinger awaits you...
Volfy
1000 Posts Club!
Step 2 of Modifying the Modification... Goal is the turn the Injen into a TRUE cold air intake system.
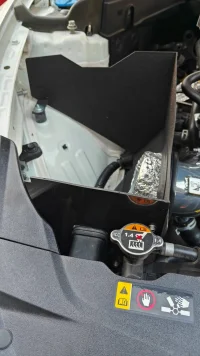
First thing was to add a 3rd wall/baffle to improve the isolation of the "air box". Injen make zero effort at sealing off towards the front of the car. So I made a baffle plate out of ABS sheet and attached it to the Injen baffle plate. This allows only the stock intake port to poke through.
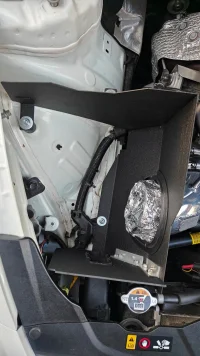
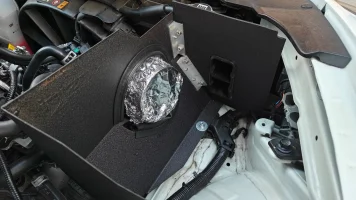
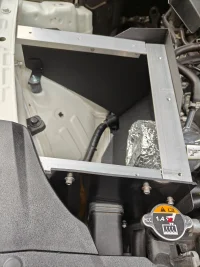
Then support brackets for the top plate are added.
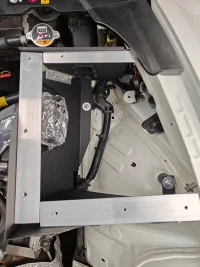
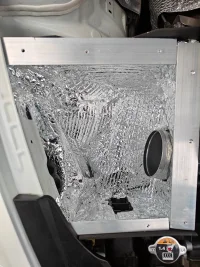
Followed by making the "air box" into an igloo, using reflective bubble insulation sheet.
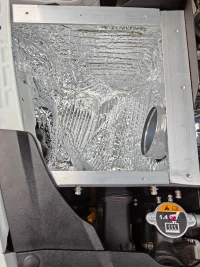
Now re-install the oversized K&N cone filter into its new cozy home. With the air box now well sealed all the way around, the only two possible intake air paths are:
1. Stock intake port
2. front fender well
Both paths draw air that are about as "cool" as intake air can get, given whatever the ambient air temp happens to be.
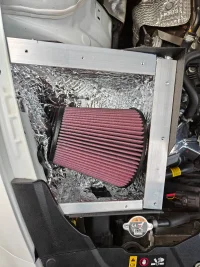
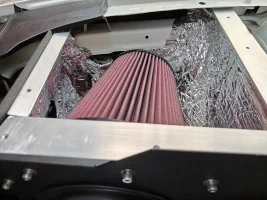
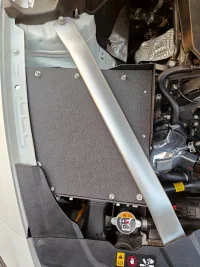
Finally, the top plate completes the sealed insulated air box. Yes, the underside of the top plate also received the reflective bubble sheet.
First thing was to add a 3rd wall/baffle to improve the isolation of the "air box". Injen make zero effort at sealing off towards the front of the car. So I made a baffle plate out of ABS sheet and attached it to the Injen baffle plate. This allows only the stock intake port to poke through.


Then support brackets for the top plate are added.


Followed by making the "air box" into an igloo, using reflective bubble insulation sheet.


Now re-install the oversized K&N cone filter into its new cozy home. With the air box now well sealed all the way around, the only two possible intake air paths are:
1. Stock intake port
2. front fender well
Both paths draw air that are about as "cool" as intake air can get, given whatever the ambient air temp happens to be.


Finally, the top plate completes the sealed insulated air box. Yes, the underside of the top plate also received the reflective bubble sheet.

Ohiocruiser
1000 Posts Club!
- Joined
- Sep 10, 2020
- Messages
- 1,877
- Reaction score
- 1,394
- Points
- 118
Nice fab skills. But all you did was just replicate the stock airbox.Step 2 of Modifying the Modification... Goal is the turn the Injen into a TRUE cold air intake system.
First thing was to add a 3rd wall/baffle to improve the isolation of the "air box". Injen make zero effort at sealing off towards the front of the car. So I made a baffle plate out of ABS sheet and attached it to the Injen baffle plate. This allows only the stock intake port to poke through.
View attachment 85121
View attachment 85123
View attachment 85124
Then support brackets for the top plate are added.
View attachment 85125
View attachment 85126
Followed by making the "air box" into an igloo, using reflective bubble insulation sheet.
View attachment 85127
View attachment 85128
Now re-install the oversized K&N cone filter into its new cozy home. With the air box now well sealed all the way around, the only two possible intake air paths are:
1. Stock intake port
2. front fender well
Both paths draw air that are about as "cool" as intake air can get, given whatever the ambient air temp happens to be.
View attachment 85129
View attachment 85130
Finally, the top plate completes the sealed insulated air box. Yes, the underside of the top plate also received the reflective bubble sheet.
View attachment 85131
Volfy
1000 Posts Club!
In some sense, yes. But with 3 differences.Nice fab skills. But all you did was just replicate the stock airbox.
1. That K&N is huge compared to the stock pancake filter. It's larger than any aftermarket CAI system. The ability to upgrade to a larger K&N is why I chose Injen instead of aFe.
2. This has the ability to draw cool air from the fender well. Stock air box can only suck thru the front port.
3. This is better insulated than the stock air box.
Ohiocruiser
1000 Posts Club!
- Joined
- Sep 10, 2020
- Messages
- 1,877
- Reaction score
- 1,394
- Points
- 118
I see. Can you still hear the turbo?In some sense, yes. But with 3 differences.
1. That K&N is huge compared to the stock pancake filter. It's larger than any aftermarket CAI system. The ability to upgrade to a larger K&N is why I chose Injen instead of aFe.
2. This has the ability to draw cool air from the fender well. Stock air box can only suck thru the front port.
3. This is better insulated than the stock air box.
From interior to exterior to high performance - everything you need for your Stinger awaits you...
Volfy
1000 Posts Club!
Surprisingly, yes, but a good bit more subdued. Suits me just fine actually, as I really don't need to hear the woosh to know my turbo is working.I see. Can you still hear the turbo?
Anyhow, just came back from today's AutoX. I monitored the Intake Air Temp the whole time and the results were very telling. I did the same at last month's AutoX, with the Injen intake and K&N filter "naked" (see post #30 above). That time, the IAT would drop to around 125F coming back to grid after running the course. From there, as the engine sat idling, the IAT would slowly creep up into the 140's. The longer it sat, the higher it crept up. That was a 60-65F afternoon.
This time around, with the afternoon temp around 80F, the IAT dropped to just below 130F coming into the grid. From there though, the IAT quickly (<30secs) settled to around 136-138F and held it constantly it there, the whole time the engine sat idling at the grid... even with A/C on full blast.
I really wasn't sure how observable the difference would be, since the IAT sensor is at the intake manifold after the intercooler and turbo upstream of it. Today's results made me quite happy this true Cold Air Intake quite easily proved to be worth the mod effort.


