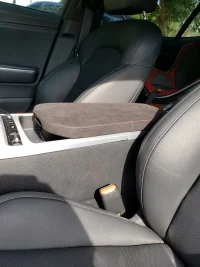
Ok. Install update. While it looks like you can just unbolt the current cover, you cannot. After some trials and failures with getting to the bolts I did something else.
You can remove just the top. Now, graphic warning, you will destroy a small part of the plastic cover on the bottom of the original armrest. Doesn't matter to me because you get a fresh one with the new armrest.
Steps to unassemble the new armrest from the hinge:
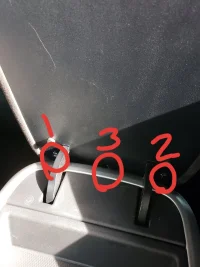
You can start by removing the two rubber spacers near the latch with some pliers, then remove the two small Phillips screws behind them. Use a number 1 tipped screwdriver.
Then you'll see three screws towards the hinge. Remove all three. The same screwdriver works fine. Collect these five screws and two grommets for later use.
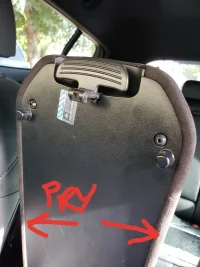
You can then use a large flat pry bar or flat screw driver to disconnect the clips from the back of the plastic piece. I started where I could separate with my fingers and just worked around. It is not that tough and don't worry about damage... That leatherette cover is durable and you are working on the bottom edge. Should take just a few seconds to separate.
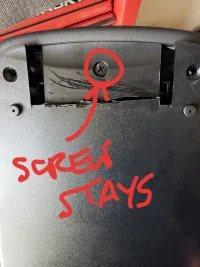
Finally, with the screws exposed to where the hinge mounts, you can simply remove all four. You should keep these but you'll use the ones from the old hinge to reassemble.
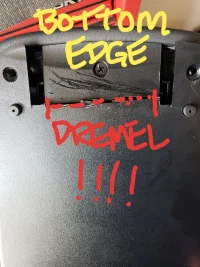
Now repeat the first two steps on the stock armrest... But with two changes. You will not be able to remove the center screw that is near the hinge. There just isn't much clearance. The other two will take some angling with your screw driver and I recommend some masking tape on the shaft of the driver as to not scratch the trim on the center console. Just be pstient and work slowly. They aren't torqued too tightly, but you'll beat them up a bit. Again, not a big deal because they are hidden 99.9% of the time.
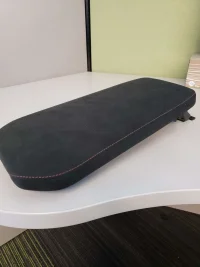
Now the graphic content. You'll have to start unclipping the plastic from the cover but it will remain connected by this last screw. Enter Dremel. Cut in between the hinges to allow the cover to be removed. Once cut you can remove the four screws from the hinge once the rest of the plastic slides away. Remove the armrest and then you can reassemble.
Connect the hinge to the new armrest with the four screws you just removed, then slide the new plastic piece in position and re-connect to the armrest. I started with the clips right near the latch and the rest zippered in nicely. Attach the two small screws and push the rubber grommets back in. At the bottom you will only get the two outer screws back in since you still don't have clearance. Again, take your time and work them in slowly. They will tighten once the threads catch.
That bottom screw not being present didn't seem to allow any play in the cover since most of the work is being done by plastic clips. However, this is not an official installation and you could have a groan or squeak at some point if it creates space.


 kdmwarehouse.com
") . Looks great!
. Looks great!