You are using an out of date browser. It may not display this or other websites correctly.
You should upgrade or use an alternative browser.
You should upgrade or use an alternative browser.
Power for dash cameras??
- Thread starter white03
- Start date
ChaneRZ
1000 Posts Club!
From interior to exterior to high performance - everything you need for your Stinger awaits you...
87and66
Stinger Enthusiast
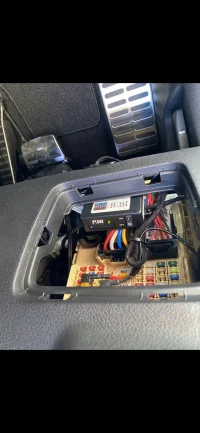
I have mine plugged into the 12v outlet in the back. I routed the wires behind the headliner, then behind the A pillar, then under my weathertech floor liner, then under the seat and into the back. Not even noticeable
Morridin19
Member
- Joined
- Jul 14, 2020
- Messages
- 20
- Reaction score
- 8
- Points
- 3
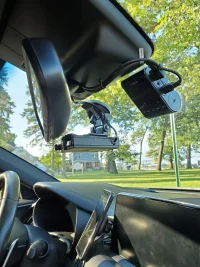
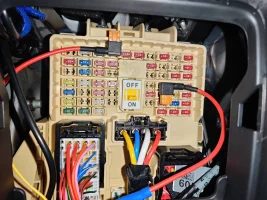
I used 2 Add-A-Fuse taps to take power of from the fuse panel on the lower drivers side. Ran the power cable tucked behind the headliner and windshield and then used a trim tool to route around and under the top of the A-Pillar and then down underneath the door weather seal to the fuse panel.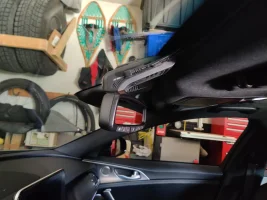
That was the easy part of the whole install. I have a 2-ch dash cam and had to run a USB cable all the way to the rear hatch... that took a lot of time and some choice words, but is totally clean, probably 2-3inches of cable show right at the back where it runs to the camera.


That was the easy part of the whole install. I have a 2-ch dash cam and had to run a USB cable all the way to the rear hatch... that took a lot of time and some choice words, but is totally clean, probably 2-3inches of cable show right at the back where it runs to the camera.
Edders
Active Member
- Joined
- Apr 14, 2020
- Messages
- 143
- Reaction score
- 79
- Points
- 28
- Location
- Toronto, Mississauga if you're nasty
I used 2 Add-A-Fuse taps to take power of from the fuse panel on the lower drivers side. Ran the power cable tucked behind the headliner and windshield and then used a trim tool to route around and under the top of the A-Pillar and then down underneath the door weather seal to the fuse panel.View attachment 49474
View attachment 49475
That was the easy part of the whole install. I have a 2-ch dash cam and had to run a USB cable all the way to the rear hatch... that took a lot of time and some choice words, but is totally clean, probably 2-3inches of cable show right at the back where it runs to the camera.
How did you ultimately attach the rear-facing camera? I have a 2 channel ordered, and I was thinking about how I would mount the rear camera. I would prefer to mount on the rear window, but I don't know how I would rout the attaching cable with the moving hatch. I would assume you would need to hide some slack somewhere in the setup?
Morridin19
Member
- Joined
- Jul 14, 2020
- Messages
- 20
- Reaction score
- 8
- Points
- 3
The rear facing camera is stuck to the glass with double sided tape (came with the camera).
I ran the USB cable underneath the trim above the CHMSL. I had to remove that rim, and then ran the cable through the wire cover so it was completely hidden, and then underneath the roof liner until the rear door and then underneath the weather stripping on the doors.
The excess cable I cable tied and then used some foam tape to prevent rattling and tucked into the spare spaces along the way.
If you need I can take some pictures and markup where I ran the cable, but at the end of the day there is only a few inches showing at the rear.
Morridin19
Member
- Joined
- Jul 14, 2020
- Messages
- 20
- Reaction score
- 8
- Points
- 3
Here is the rear camera:
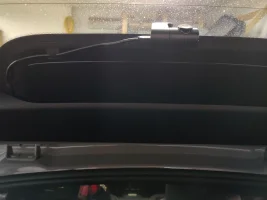
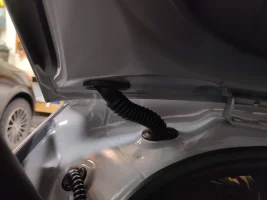
The large plastic cover where the cable goes underneath in the picture above had to be removed so I could fish the cable through this sleeve/cover:
From there I ran the cable under the head liner right where the plastic trim is behind the rear headrest for a bit until the door.
Then at the door I ran the cable under the door weather stripping and the head liner.
Then fed it through under the headliner at the B pillar and then same thing as the rear door I ran it just under the headliner at the weather stripping on the door up to the A pillar.
From there just fed it under the top of the trim for the A Pillar and then up the headliner above the windshield to the front camera.
Hope that helps.

The large plastic cover where the cable goes underneath in the picture above had to be removed so I could fish the cable through this sleeve/cover:

From there I ran the cable under the head liner right where the plastic trim is behind the rear headrest for a bit until the door.
Then at the door I ran the cable under the door weather stripping and the head liner.
Then fed it through under the headliner at the B pillar and then same thing as the rear door I ran it just under the headliner at the weather stripping on the door up to the A pillar.
From there just fed it under the top of the trim for the A Pillar and then up the headliner above the windshield to the front camera.
Hope that helps.
From interior to exterior to high performance - everything you need for your Stinger awaits you...


