You are using an out of date browser. It may not display this or other websites correctly.
You should upgrade or use an alternative browser.
You should upgrade or use an alternative browser.
Mishimoto Oil Catch Can Hose sizes
- Thread starter wittmason
- Start date
RedCal
2500 Posts Club!
OD would be very helpful as well  (at least for me)
Last edited:
Hockster
Stinger Enthusiast

Direct-Fit Catch Can, PCV Side fits Kia Stinger GT 2018-2021
Kia came out of nowhere to stake their claim in the luxury sedan market segment. With the intuitive automatic transmission coupled to the 3.3L twin-turbocharged V6, it's no wonder the likes of standard benchmarks are worried. The real question is, how long will that last. Direct injection...
Inlet is 3/8, outlet is 1/2. I don't recall the lengths, one is bent to fit.
______________________________
wittmason
Member
- Joined
- Jun 18, 2020
- Messages
- 20
- Reaction score
- 12
- Points
- 3

Direct-Fit Catch Can, PCV Side fits Kia Stinger GT 2018-2021
Kia came out of nowhere to stake their claim in the luxury sedan market segment. With the intuitive automatic transmission coupled to the 3.3L twin-turbocharged V6, it's no wonder the likes of standard benchmarks are worried. The real question is, how long will that last. Direct injection...www.mishimoto.com
Inlet is 3/8, outlet is 1/2. I don't recall the lengths, one is bent to fit.
Thank you @Hockster
From interior to exterior to high performance - everything you need for your Stinger awaits you...
wittmason
Member
- Joined
- Jun 18, 2020
- Messages
- 20
- Reaction score
- 12
- Points
- 3
thye have an installation video on YouTUbe, will tell you all you need to know
I’ve watched that video many times.
They don’t tell you hose sizes or lengths? I’m working on a how to for a misimoto clone install.
Musicman_94
Newish Member
- Joined
- Sep 8, 2020
- Messages
- 7
- Reaction score
- 1
- Points
- 3
Did you figure out the hose sizes and lengths ?I’ve watched that video many times.
They don’t tell you hose sizes or lengths? I’m working on a how to for a misimoto clone install.
wittmason
Member
- Joined
- Jun 18, 2020
- Messages
- 20
- Reaction score
- 12
- Points
- 3
Yes I have been meaning to post a tutorial on this so I will get a small one going here.
The things you need to do this DIY Catch can are here
Amazon Shopping List - (corner brace not included)
1 - Catch can (I used a large Mishmoto clone)
1- 1/2" hose
1 - 3/8" ID 5/8" OD hose
1 - Roll PTFE Yellow Tape
1 - 16mm Oil drain plug
1 - 5" steel corner brace (pictured) - I purchased this at my local Ace Hardware
1 - Nylon nut (pictured)
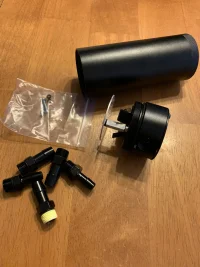
Mishimoto clone
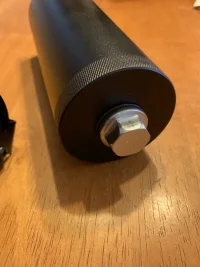
16mm oil drain plug put on the bottom of the catch can
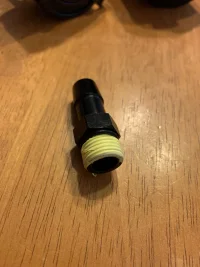
Barb with Yellow PTFE to seal the can better. Keeps the smelly gas out of the compartment.
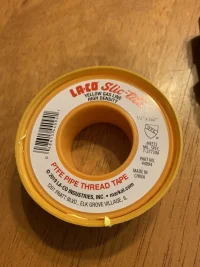
Yellow PTFE tape
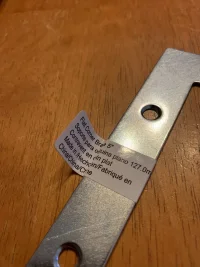
5" steel corner brace to hold catch catch can
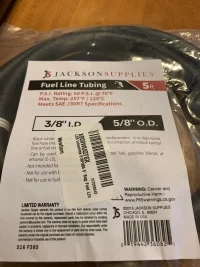
3/8" ID 5/8" OD Hose
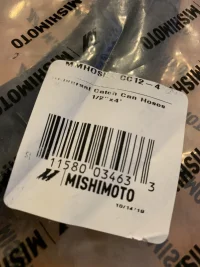
Mishomoto 1/2" Catch Can hose
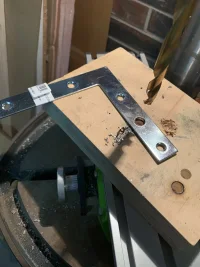
You're going to drill and shape the brace to eventually hold the catch can. This is where the brace attaches to the car.
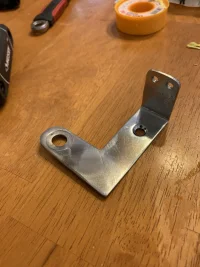
When you're done shaping your brace should look something like this. Test fit as you shape the brace. The 2 small holes are where the catch can attach to the brace.
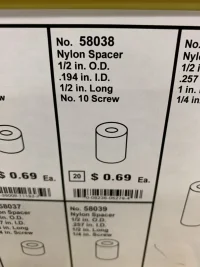
You're going to purchase a 1/2" Nylon washer for the can to "sit on" (shown in the next picture)
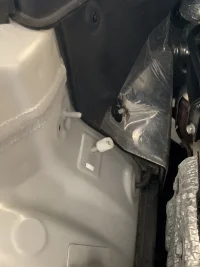
You'll cut a 30 degree angle off the corner of the nylon washer. The side of the catch can will rest on this nylon.
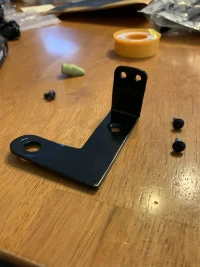
Your catch can brace will look sexy when you paint it. Right?!
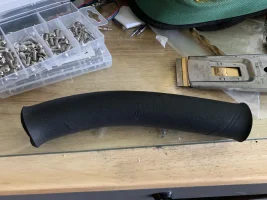
Next step is to take the large "foam hose" and pull it off the old hosing.
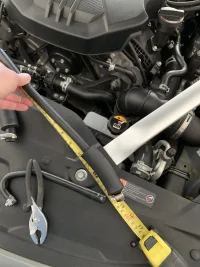
Measure 14.5" of 1/2" hose. Also note the approx. length of the foam hose and it's position.
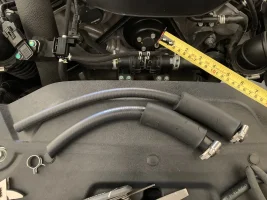
Both hose sizes 1/2" on top 3/8" on bottom.
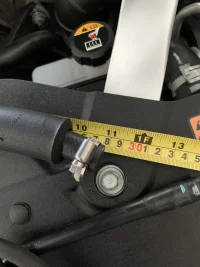
The 3/8" hose is approx 11".
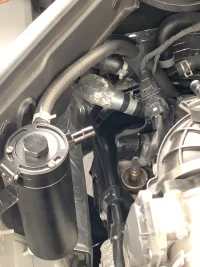
Catch can installed with 1/2" hose side
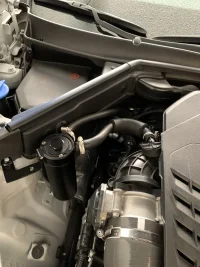
Catch can final install.
In retrospect, after running this setup for 8-9months now. I probably should have opted for the smaller catch can. There is stuff being caught but but it's really not alot. A smaller can would have worked probably better. My thing was I didn't want to have to mess with it a lot and the current price for this mod (when I was looking months ago) was ridiculous.
I hope these instructions help someone.
The things you need to do this DIY Catch can are here
Amazon Shopping List - (corner brace not included)
1 - Catch can (I used a large Mishmoto clone)
1- 1/2" hose
1 - 3/8" ID 5/8" OD hose
1 - Roll PTFE Yellow Tape
1 - 16mm Oil drain plug
1 - 5" steel corner brace (pictured) - I purchased this at my local Ace Hardware
1 - Nylon nut (pictured)

Mishimoto clone

16mm oil drain plug put on the bottom of the catch can

Barb with Yellow PTFE to seal the can better. Keeps the smelly gas out of the compartment.

Yellow PTFE tape

5" steel corner brace to hold catch catch can

3/8" ID 5/8" OD Hose

Mishomoto 1/2" Catch Can hose

You're going to drill and shape the brace to eventually hold the catch can. This is where the brace attaches to the car.

When you're done shaping your brace should look something like this. Test fit as you shape the brace. The 2 small holes are where the catch can attach to the brace.

You're going to purchase a 1/2" Nylon washer for the can to "sit on" (shown in the next picture)

You'll cut a 30 degree angle off the corner of the nylon washer. The side of the catch can will rest on this nylon.

Your catch can brace will look sexy when you paint it. Right?!

Next step is to take the large "foam hose" and pull it off the old hosing.

Measure 14.5" of 1/2" hose. Also note the approx. length of the foam hose and it's position.

Both hose sizes 1/2" on top 3/8" on bottom.

The 3/8" hose is approx 11".

Catch can installed with 1/2" hose side

Catch can final install.
In retrospect, after running this setup for 8-9months now. I probably should have opted for the smaller catch can. There is stuff being caught but but it's really not alot. A smaller can would have worked probably better. My thing was I didn't want to have to mess with it a lot and the current price for this mod (when I was looking months ago) was ridiculous.
I hope these instructions help someone.


