You are using an out of date browser. It may not display this or other websites correctly.
You should upgrade or use an alternative browser.
You should upgrade or use an alternative browser.
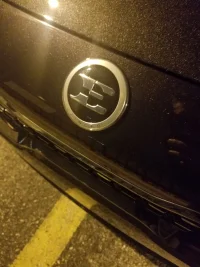
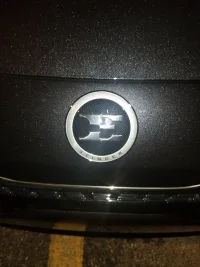
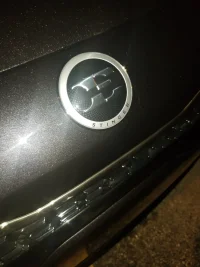
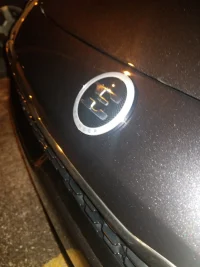
lost some paint on front badge install. What to do
- Thread starter jrhodes87
- Start date
Wow, seeing you guys destroy your paint is painful. Here is a quick tip to protect your paint during badge removal:
STOP USING A HEAT GUN OR EVEN A HAIR DRYER.
The best way to heat up the glue under your Kia badges is by using steam. If you have a steam gun or even one of those steam mops, that will transfer a great amount of heat to the adhesive under the badge without hurting the paint at all. Your car finish can easily take the temperature of the steam. Just wrap the end of the unit in a microfiber cloth and hold it against the badge for a few minutes to allow it to heat up. Then just use some high test fishing line. Should pop off pretty easily.
jrhodes87
Active Member
- Joined
- Oct 16, 2017
- Messages
- 321
- Reaction score
- 189
- Points
- 43
Wow, seeing you guys destroy your paint is painful. Here is a quick tip to protect your paint during badge removal:
STOP USING A HEAT GUN OR EVEN A HAIR DRYER.
The best way to heat up the glue under your Kia badges is by using steam. If you have a steam gun or even one of those steam mops, that will transfer a great amount of heat to the adhesive under the badge without hurting the paint at all. Your car finish can easily take the temperature of the steam. Just wrap the end of the unit in a microfiber cloth and hold it against the badge for a few minutes to allow it to heat up. Then just use some high test fishing line. Should pop off pretty easily.
Yup I'll agree to this. I removed my hyundai badge on my genesis in 32 degree weather with fishing line, no problems at all (except being cold)
Idk what possessed me to think I needed a heat gun for this badge removal. You live you learn!
______________________________
robz32
Texas Stinger Swarm
Wow, seeing you guys destroy your paint is painful. Here is a quick tip to protect your paint during badge removal:
STOP USING A HEAT GUN OR EVEN A HAIR DRYER.
The best way to heat up the glue under your Kia badges is by using steam. If you have a steam gun or even one of those steam mops, that will transfer a great amount of heat to the adhesive under the badge without hurting the paint at all. Your car finish can easily take the temperature of the steam. Just wrap the end of the unit in a microfiber cloth and hold it against the badge for a few minutes to allow it to heat up. Then just use some high test fishing line. Should pop off pretty easily.
THIS^^^^
Don't know where everyone is getting the idea of heating up the area with a heat gun or hair drier. Just did mine this weekend and just used a heavy weight fishing line, some patience, muscle and goo gone, and that was it. That was for both front and rear emblems. No paint chipping issues.
Now I Do have to say that KIA needs to use better bonding chemicals when prepping the parts for paint, and they also need to cook the paint longer on the assembly line as I was left with ghosting/traces on the clear coat from the small Stinger emblem (maybe a chemical reaction with the glue?). Tried to paint correct it, and even though it helped, you can still notice it when get up close and at the right angle.
JustThatPenguin
Active Member
- Joined
- Feb 28, 2018
- Messages
- 281
- Reaction score
- 150
- Points
- 43
From interior to exterior to high performance - everything you need for your Stinger awaits you...
Robs
Active Member
- Joined
- Nov 11, 2017
- Messages
- 362
- Reaction score
- 286
- Points
- 68
Having watched several other videos on badge/emblem removals, most have used a heat gun. One did mention that heating the badge or emblem would be more relevant if the car was an older one. When removing my small script and Kia oval, the easy part was actually sawing through the adhesive tape with the fishing line, to the point i actually wondered if heating it did anything at all. This might be due to the fact that the car was produced and shipped over just a month before so the exterior of the car would not have gone through alot of exposure, hence the adhesives not hardening or shrinking through ageing perhaps.
mldavis2
1000 Posts Club!
I am a retired forensic chemist and worked in a crime lab for over 20 years. Part of my forensic experience was working with various adhesives such as duct tape removal from evidence and other related tasks. If you look at an adhesive under a microscope, as you pull it from the bonding surface, you will see tiny little strands of "glue" slowly stretch and then release from the least attractive surface. If you pull quickly, the glue strands can have enough force to actually pull the bonding surface with it, and if the clearcoat or undercoat or primer is the weakest bond, that's where the surface will separate. By pulling very slowly (and I mean VERY slowly - the slower the better), you can remove the emblems from the paint surface in normal (comfortable) ambient temperatures once you get under one edge. If you can use a plastic wedge and maintain tension, you can even leave the wedge under tension and go have a cup of coffee and come back minutes later and re-tension the wedge. Heating affects not only the adhesive, but also the underlying clearcoat, undercoat and primer layers, so very little heating should be used if at all.
If you "saw" through the adhesive with fishing line or dental floss, you will likely split the adhesive layer which works OK but then you must work to remove a thick layer of adhesive from the paint. Picking adhesive with fingernails is slow and tedious but fingernails shouldn't mar the paint finish if you're careful. Jamming a plastic wedge or credit card under the emblem can scuff the clear coat if you get between the adhesive and the clearcoat. Be very careful doing that.
Finally, depending on the color of your paint, the adhesive does contain hydrocarbon chemicals that can discolor the clearcoat and undercoat very slightly. I don't know of any solution to that problem, but as @robz32 says above, it is usually only visible if you get the light at the right angle. I have a very faint discoloration (very slightly lighter) on my HiChroma Red but you have to know it's there and know what to look for.
StingerGT68
Stinger Enthusiast
- Joined
- Jan 29, 2018
- Messages
- 887
- Reaction score
- 501
- Points
- 68
Would spraying some Goo Gone on the fishing line aid in removing the badge along with reducing the likelihood of fine scratches?I am a retired forensic chemist and worked in a crime lab for over 20 years. Part of my forensic experience was working with various adhesives such as duct tape removal from evidence and other related tasks. If you look at an adhesive under a microscope, as you pull it from the bonding surface, you will see tiny little strands of "glue" slowly stretch and then release from the least attractive surface. If you pull quickly, the glue strands can have enough force to actually pull the bonding surface with it, and if the clearcoat or undercoat or primer is the weakest bond, that's where the surface will separate. By pulling very slowly (and I mean VERY slowly - the slower the better), you can remove the emblems from the paint surface in normal (comfortable) ambient temperatures once you get under one edge. If you can use a plastic wedge and maintain tension, you can even leave the wedge under tension and go have a cup of coffee and come back minutes later and re-tension the wedge. Heating affects not only the adhesive, but also the underlying clearcoat, undercoat and primer layers, so very little heating should be used if at all.
If you "saw" through the adhesive with fishing line or dental floss, you will likely split the adhesive layer which works OK but then you must work to remove a thick layer of adhesive from the paint. Picking adhesive with fingernails is slow and tedious but fingernails shouldn't mar the paint finish if you're careful. Jamming a plastic wedge or credit card under the emblem can scuff the clear coat if you get between the adhesive and the clearcoat. Be very careful doing that.
Finally, depending on the color of your paint, the adhesive does contain hydrocarbon chemicals that can discolor the clearcoat and undercoat very slightly. I don't know of any solution to that problem, but as @robz32 says above, it is usually only visible if you get the light at the right angle. I have a very faint discoloration (very slightly lighter) on my HiChroma Red but you have to know it's there and know what to look for.
mldavis2
1000 Posts Club!
Eventually you'll have to use some solvent like "Goo Gone" to clean the surface. If the thickness (amount) of adhesive is significant, it makes a gooey mess as it dissolves the remaining adhesive, so have a lot of disposable rags on hand. I haven't tried using the solvent with fishing line. Should work OK and it might act as a lubricant, but it will also leave a sticky bunch of adhesive behind to clean off. Won't hurt to try and it's probably safer than some other methods.
leftwing
Member
- Joined
- Nov 26, 2017
- Messages
- 74
- Reaction score
- 20
- Points
- 8
I started sawing through the rear badge and forgot to use the Goo Gone at first. Then not too long after that I remembered and liberally applied the stuff around the whole badge, but especially where I was sawing, and it made a big difference for me. I don't know if it was just lubricating the line, or the actual chemical doing some of the separation, but it went way easier for me at that point.
Also, regarding the heat gun.. when I re-badged the car it was 2 degrees Celsius at the time, so I did use a heat gun, but I used it at the low setting which maxes out at 24 degrees Celsius (room temperature). I basically warmed the badge up so that it wasn't frozen, and I had no problems at all.
My takeaways from the experience:
1) Low or no heat required
2) Mask all around the badge - you can get the tape slightly under the badge
3) Use lots of Goo Gone while you're cutting
4) I used 20 lb fishing line, only had one snap
5) Go very slow, take your time, you only get one shot - don't rush it
6) I used soft plastic wedges, but not to pry, just to allow me to effectively cut with the line
7) When you've cut all that you can cut with the line you have to lift the badge which is still partially glued - see step 5
8) Picking the adhesive off after removal is tedious, but keep moistening the area with Goo Gone and pick away with finger nails, oh and see step 5
______________________________
From interior to exterior to high performance - everything you need for your Stinger awaits you...
StingerGT68
Stinger Enthusiast
- Joined
- Jan 29, 2018
- Messages
- 887
- Reaction score
- 501
- Points
- 68
robz32
Texas Stinger Swarm
That is fine. I have the factory clear bra installed and the amount it overlaps will not affect the installation, make sure however to press firmly at the bottom of the emblem in order for the double side tape to stick on to the edge of the clear bra.
jchan_stinger
Member
I'm in a panic. So I rebadged the back kia badge and removed the back small stinger logo perfectly fine using a hair dryer. But when I went to do the front, I noticed that not even too long into it, I see some paint chips underneath the badge.
So currently I still have the Kia badge left on cus I'm worried the paint chip is huge. It looks like the E badge won't cover some of the chip on the right of it. Wondering if paint pen will help here?
So currently I still have the Kia badge left on cus I'm worried the paint chip is huge. It looks like the E badge won't cover some of the chip on the right of it. Wondering if paint pen will help here?
davebo
Stinger Enthusiast
I don't know how huge your version of huge is, but if you look at the end of page one I got the circular K badge and had to place it just slightly off-center to cover the paint chips I got from removing the oval badge, because like an idiot I couldn't wait to buy fishing line like I should have, so I screwed up the paint and then bought fishing line to do the rest. It's not very noticeable from an angle, and now that some debris on the highway bounced up and nicked the black plastic on the left air intake it's not even the worst thing wrong with the front of my car so all's well that ends well, right?
From interior to exterior to high performance - everything you need for your Stinger awaits you...
jchan_stinger
Member
I don't know how huge your version of huge is, but if you look at the end of page one I got the circular K badge and had to place it just slightly off-center to cover the paint chips I got from removing the oval badge, because like an idiot I couldn't wait to buy fishing line like I should have, so I screwed up the paint and then bought fishing line to do the rest. It's not very noticeable from an angle, and now that some debris on the highway bounced up and nicked the black plastic on the left air intake it's not even the worst thing wrong with the front of my car so all's well that ends well, right?
I think mine might be worse than yours unfortunately. Just looking at the chip under the badge, the circular E won't cover it. I'm not sure how off center I can go either
______________________________
DiabloStinger
1000 Posts Club!
MerlintheMad
10000 Posts Club!
Nothing is worse than the OP case. And he got it all squared away. Use the pros. And live and learn. Heh!I think mine might be worse than yours unfortunately. Just looking at the chip under the badge, the circular E won't cover it. I'm not sure how off center I can go either
Mach_Tuck
1000 Posts Club!
I have a feeling this is more due to shitty paint process then using heat. It just so happens that heat is making the shitty paint bonding even worse. I believe the underlying issue to be the paint bonding and not the use of heat.
I had every intention of rebadging the front but had full frontal PPF applied second day i brought the car home and didnt even think to advise them of the difference in shape of the badges. They went around the oval badge within 2mm so the circle badge would overlap some areas and not in others. That being the case, i did the rear Stinger only and maybe was a blessing in disguise.
I had every intention of rebadging the front but had full frontal PPF applied second day i brought the car home and didnt even think to advise them of the difference in shape of the badges. They went around the oval badge within 2mm so the circle badge would overlap some areas and not in others. That being the case, i did the rear Stinger only and maybe was a blessing in disguise.
Stinger305
Active Member
I'll be honest - if I saw this thread before I rebadged, I probably would've chickened out.
I'm in SoCal so I had the benefit of 85 degree weather (benefit?), but I just used dental floss and a wedge and had no paint issues. I used Goo Gone after to clean the adhesive off, though I'd recommend rolling what you can off with your fingers before getting it wet and messy.
SGT and Me videos are great, but I think they should edit the heat gun vid with a warning and a link to this thread in the comments!
From interior to exterior to high performance - everything you need for your Stinger awaits you...


