You are using an out of date browser. It may not display this or other websites correctly.
You should upgrade or use an alternative browser.
You should upgrade or use an alternative browser.
How to remove and replace the rear badge on the Kia Stinger
- Thread starter Kia Stinger
- Start date
washguy
Stinger Enthusiast
Neil Armstrong is rolling in his grave.....disrespectful at best  Wash
Wash
Stinger GT SS
5000 Posts Club!
washguy
Stinger Enthusiast
Haha Too funny Neil is smiling now ! Wash
Wash
AV8R
5000 Posts Club!
- Joined
- Dec 13, 2017
- Messages
- 7,325
- Reaction score
- 2,051
- Points
- 118
- Location
- Perth, Western Australia
Yes but it took an aussie satellite dish to relay signals to get you there!.. and AUS has put exactly how many men on the moon?
From interior to exterior to high performance - everything you need for your Stinger awaits you...
Stinger GT SS
5000 Posts Club!
That’s trueYes but it took an aussie satellite dish to relay signals to get you there!
I had the same problem but bought a inexpensive polishing machine. Using compound it did the trick.I'm experiencing the same issue. Tried using a compound of two different brands to no avail... It doesn't even seem like a clear coat issue; more of a pair defect given that the compound does nothing and it feels perfectly flat when I run my finger over it...
Any thoughts?
StingerNick
Active Member
DarthVaderIX
Active Member
Has anyone put the “E” badge on the back also?
Jimmer
Stinger Enthusiast
I haveHas anyone put the “E” badge on the back also?
______________________________
From interior to exterior to high performance - everything you need for your Stinger awaits you...
jatleson
Member
- Joined
- Oct 21, 2018
- Messages
- 91
- Reaction score
- 27
- Points
- 8
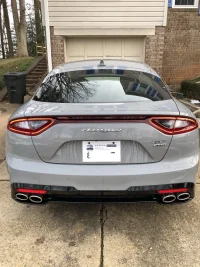
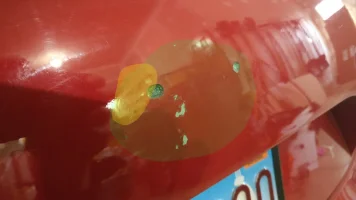
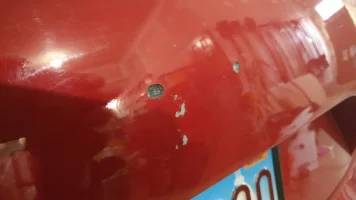
View attachment 18748 View attachment 18749 View attachment 18750 View attachment 18751 If you remove the rear badge...I’d say there is a 50/50 chance the paint chips. My auto body shop chipped the paint. They ending up having to repaint the whole rear piece. After painting they installed the 3 badges. Luckily it only cost me $50!
If they took it that far I would have had them fill the two holes and go badgeless. In the pictures the respray looks like a perfect match.
If this happens to anyone else, get some menzerna fg400 and a yellow pad on a da polisher and after about 8-10 passes with firm pressure, wipe down and examine. Keep doing this until its cleared up. One the scratches are cleared get a white pad and repeat the process with medium pressure and the last 4 passes light to very light pressure. If she’s doesn’t work you are looking at wet sanding with 2000-2500 grit sand paper, then running over it with fg400 with a white pad. I could fix that black panel pictured in 20 min.Well... Wish me luck haha.
Banana_Thunder
Member
If you remove the rear badge...I’d say there is a 50/50 chance the paint chips. My auto body shop chipped the paint. They ending up having to repaint the whole rear piece. After painting they installed the 3 badges. Luckily it only cost me $50!
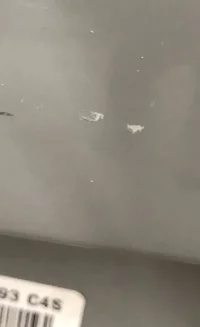
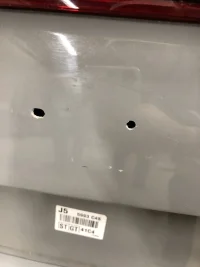
Yeah, just learned the hard way. Here's how it went
1) Used hair dryer to head the rear badge.
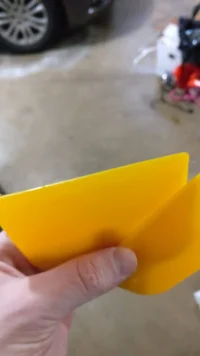
2) Used plastic pry tools to get under bage
3) Badge successfully removed, residue left on car. Note, at this point there is no paint missing.
HOWEVER.
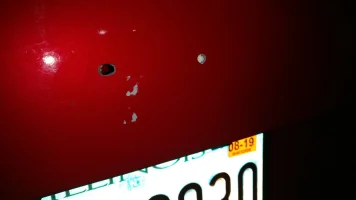
4) Removed residue with fingernails and rubbing, oddly 2-3 spots would not come off.
5) Used goo gone on spots and to clean up the rest of the adhesive area.
6) Spots revealed missing paint - would not say paint even chipped as there were no paint chips to be found, rather the paint had blended into the 3M adhesive
jatleson
Member
- Joined
- Oct 21, 2018
- Messages
- 91
- Reaction score
- 27
- Points
- 8
Interesting. What year is your Stinger - 18 or 19? I'm up in 60060.Yeah, just learned the hard way. Here's how it went
1) Used hair dryer to head the rear badge.
2) Used plastic pry tools to get under bage
3) Badge successfully removed, residue left on car. Note, at this point there is no paint missing.
View attachment 21304
HOWEVER.
4) Removed residue with fingernails and rubbing, oddly 2-3 spots would not come off.
5) Used goo gone on spots and to clean up the rest of the adhesive area.
6) Spots revealed missing paint - would not say paint even chipped as there were no paint chips to be found, rather the paint had blended into the 3M adhesive
View attachment 21305
Banana_Thunder
Member
Interesting. What year is your Stinger - 18 or 19? I'm up in 60060.
'18, in 60013. I'm wondering if it is a paint curing problem as I had freed the edges all the way around and then started the peel from the right side of the badge to the left. What really strikes me as odd is the missing paint just below the holes as this was completely covered by adhesive that was not touched by any tool.
From interior to exterior to high performance - everything you need for your Stinger awaits you...
washguy
Stinger Enthusiast
Yep the paint under these badges is soft or not even painted....but if your new badge covers the bald spot don't sweat it....the E badge is my fav....don't forget the mono fishing line to remove badges or dental floss....those two work great  Wash
Wash
______________________________
StingerNick
Active Member
Mine is a ‘19. The adhesive basically pulled up the paint. A lot of people use the fishing line technique to saw through warm adhesive, but maybe that would be even worse with a Stinger.'18, in 60013. I'm wondering if it is a paint curing problem as I had freed the edges all the way around and then started the peel from the right side of the badge to the left. What really strikes me as odd is the missing paint just below the holes as this was completely covered by adhesive that was not touched by any tool.
Banana_Thunder
Member
Yep the paint under these badges is soft or not even painted....but if your new badge covers the bald spot don't sweat it....the E badge is my fav....don't forget the mono fishing line to remove badges or dental floss....those two work greatWash
I already had the script badge ready to go, but it won't cover the vertical range of these spots as it barely covers the drilled holes.
Banana_Thunder
Member
washguy
Stinger Enthusiast
RUT ROH......I already had the script badge ready to go, but it won't cover the vertical range of these spots as it barely covers the drilled holes.
From interior to exterior to high performance - everything you need for your Stinger awaits you...


