Pnbnationsbest
Stinger Enthusiast
Thanks!
The car lovers social network
Automotive components
Create videos that captivate
Automotive Hot or Not
Vehicle hacker protection
By enthusiasts, for enthusiasts
Advertise with us!
Timing is everything
Get the best deals on wheels!
Vehicle Specific Solutions
Brands you can trust
Promo code: REDLINE
Kia Hyundai Auto Racing
Authentic Tuning

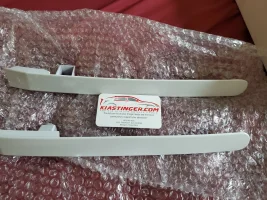
Everyone who pre-ordered snow white pearl body colored rear side reflectors had theirs go out in the mail today. Check your bulk mail folder for the tracking number as your ISP has decided this email isn't important to you.

Looking at my order online still says back ordered I guess I missed out back in May when I ordered.Hmmm just looked I don't see anything
I'm on the road. Please contact me directly for assistance. If you ordered a white set it either shipped today or, if I somehow missed you, they're in stock. Contact me directly and I'll get back to you directly.Looking at my order online still says back ordered I guess I missed out back in May when I ordered.
Imo one of the nicest features of the stinger is it’s red reflectors.
As luck would have it I just got done passing my CISM exam and I'm on my way home to celebrate with this little project. Many thanks for tracking down and posting the stepsOk is there instructions somewhere to install these like a video/pictures I see the following on the website but video/pictures would be better for me.
INSTALLATION INSTRUCTIONS:
1. Open hatch
2. Remove center hatch trim piece. Trim is removed by undoing two plastic fasteners on either side and popping out four retaining pins.
3. Unscrew the four screws that hold down trim pieces on inner fender wells.
4. Pop out four retaining pins that hold down side trim pieces.
5. Remove black trim pieces flanking the tail light assemblies.
6. Unscrew tail light and remove assembly.
6a. *Passenger side only* unscrew radio amplifier to gain access to three screws that attach reflectors to body.
7. Pop off OEM reflector.
8. Install aftermarket insert, and screw into place.
9. Reinstall tail light assembly.
10. Reinstall fender liner.
11. Reinstall center trim piece.


Take pictures for me lolAs luck would have it I just got done passing my CISM exam and I'm on my way home to celebrate with this little project. Many thanks for tracking down and posting the steps
Lol I don't even have any tools for itStop being a baby. We all did it WITHOUT any instructions.
10mm socket, buy five.