Build Log - Sound System Upgrade

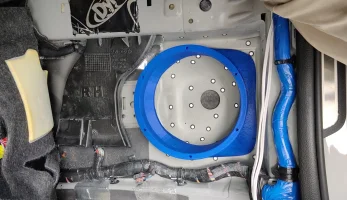
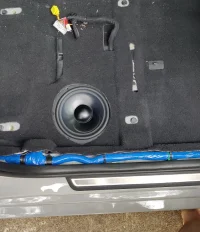
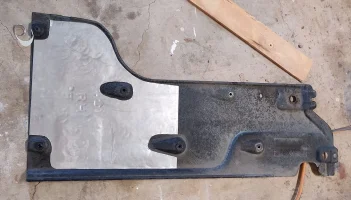
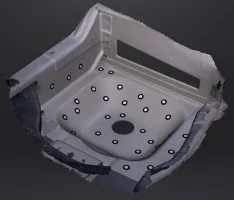
We recently got a new toy at work (3D scanner) so I borrowed it for a little "off the job training". That's what the dots are for.

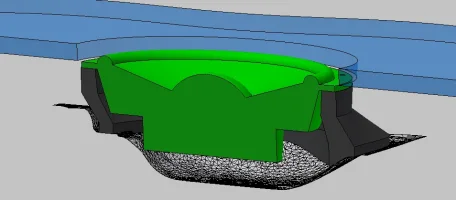
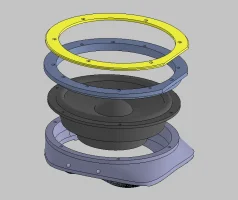
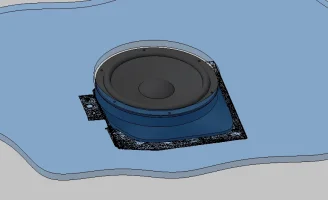
Scanned the OEM subwoofer pan, then modeled up an adapter in Inventor. I'll print a quick and dirty mockup in PLA to see if it fits before cutting anything.
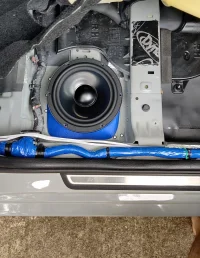
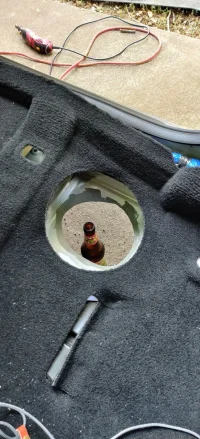
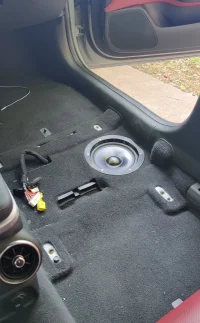
The carpet cutout will have to be enlarged, and I'll have to figure out a grille of some sort, but it looks possible.

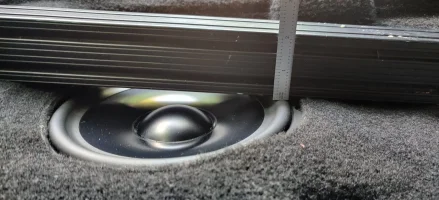
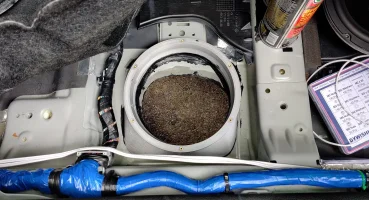
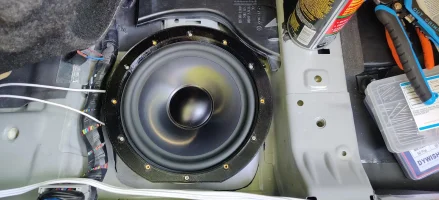
I'll likely need to open up the hole in the floor a bit, but speaker doesn't look to even hang down out of the car, which is nice.
1688159317376.webp

1688159337894.webp

1688159452576.webp


Next step will be the midrange pods.
 
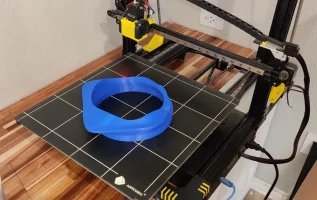
Got the adapter mockup printer in PLA and I gotta say, this 3D scanner is a game changer. The fit to the floorpan is PERFECT. My carpet height measurement, however, is not.

The speaker surround is only about .13 away from where the seat frame will be, and Xmech on the TM8 is 12mm, so I'm going to drop it another .25. I'm not against shimming the aft seat attachment another .13 if needed. Also added some wire pass-thru holes to the model.

Pretty confident in the fitment at this point, so I'm printing the next one in PETG (maybe one day I'll get an enclosure so I can use ASA)

IMG_20230701_150549.webp
IMG_20230701_151004.webp
IMG_20230701_151031.webp
IMG_20230701_151042.webp
IMG_20230703_130343.webp
 
Awesome
Love the progress pics

Please keep it up.
 
______________________________
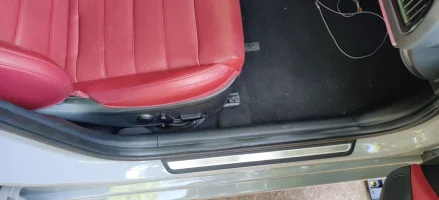
Got the passenger side "done" (minus grille) today.

First I treated the underbody panel with some CLD. I also ran strips of closed cell foam along all the contact points of this panel (and the one behind it) to help prevent rattles.


IMG_20230709_123210.webp


Next I installed the speaker housing. I sealed it down with NP1, and primed/sealed the edges of the hole as well.
I'm using a 3-piece design which consists of the housing, [speaker], a riser, [carpet], trim ring.
This clamps the carpet down to the housing and makes for a pretty clean "hole".

The trim ring needs a grille, it's too thin to print, so I'll have to order some perforated metal to go into the stackup.
The seat frame is uncomfortably close to the ring, and will definitely hit when I add the grille, so I'm debating whether to just run a strip of foam to the seat frame, or shorten the riser.


1688944911371.webp

IMG_20230709_130657.webp

IMG_20230709_170414.webp

IMG_20230709_173629.webp

IMG_20230709_175048.webp
 
From interior to exterior to high performance - everything you need for your Stinger awaits you...
While I wait on parts to fix the SPDIF issue, I figure I should take some measurements for the folks interested in the TM8 install.

No EQ on any of these.
midbass crossovers:
  • HPF 70 (LR4)
  • LPF 300 (LR4)
midrange crossovers:
  • HPF 300 (LR4)
  • LPF 3000 (LR4)

Midbass first measurements below.

This is my first real foray into SQ and tuning, could use some help interpreting this, but the passenger side seems like a mess, null at 213 and I'm not sure what's up at 112, but it's very audible.

Two ideas/observations came to mind:
1) The underbody deflector "sings" like nobody's business. I have to think this would be affecting my response, right? I took a measurement while laying under the car and physically bracing the panels.
2) The seat straddles the speaker (laterally), exposing some of the cone in the crack between the seat and door. See my pics a few posts above. I stuffed some towels into the crack to see if it made a difference.

I did the above for both driver and passenger side.

Initial measurements:
1690331010953-png.394222


Driver side
1690331429921-png.394223


Passenger side
1690331490026-png.394231
 
Ugh, nothing but headaches with this Maestro/Blackbird combo.
I bought the ACC-AR-SPDIF module, and it works great, no more crackles over SPDIF, unfortunately the maestro firmware is just NOT working for the Stinger. I wonder if it works for any KIA/Hyundai cars?

I spoke to Arc support and we verified everything in the DSP seems to be set up correctly, and it works perfectly fine when fed audio from my laptop (aux-to-RCA adapter). But when I start the car with the maestro installed, there is no audio, even though the Arc software sees input (happens with both analog and toslink)

I noticed that if I manually toggle the input mixer off then back on, the audio turns on.
In the photos below, I'm using inputs 7 & 8 because the maestro keeps enabling them even if I have them turned off. I figured maybe that's its "preferred inputs", but this issue happens on any input.
Also if I touch the volume knob or steering wheel volume rocker, the audio immediately cuts off again (the same procedure above will bring it back).

This whole dance repeats every time I start the car, I'm just not sure if the blackbird is misinterpreting the maestro commands, or if the maestro is misinterpreting the CAN bus commands.
(I would tend to assume the latter, but why would the thing start up with inputs "disabled" even though they appear enabled?)

So frustrating....


Font Screenshot Software Technology Electronic device


Colorfulness Font Screenshot Technology Software


Font Software Screenshot Technology Electronic device
 
Picked up some Stereo Integrity Carbon C3's on sale, so I guess it's time to make some pillars.
I've never made pillars before so this should be horribly inefficient and time consuming :)


Started by 3D printing some temporary pods to experiment with aiming/placement. I actually did this with GB25s, so hopefully the SI's work the same. Actually drove around like this for a week or so, mostly out of laziness.
Frankly, the best sounding placement to my ears was facing straight up reflecting off the window. I mulled over trying to build up-facing pods, or cutting my dash, but ultimately decided against it and picked the "runner up" position which was pointed more or less at the roof between the headrests.

img_20230723_084245-1-jpg.406433


img_20230727_065640-jpg.406434


Next I printed some mounting rings from black ASA. I printed it tall and hacked away with a dremel until I was happy. In retrospect, this was a huge waste of time and I should have just used short rings and dowels like the smart folks.
Checked my aim using a .223 laser boresighter.

img_20231011_152115-jpg.406435


img_20230917_081832-1-jpg.406436


I tried to be fancy and skip the stretched fabric in favor of making a little skeleton of the shape I wanted and draping the glass over it. Again, bad idea which cost me time and ultimately required MUCH more bondo.
Fun fact, polyester resin does not chemically bond with ASA, so make sure to rough it up and drill holes for a good mechanical fixturing. Nylon may be a better candidate.

img_20231013_085240-jpg.406437


Next is bondo and sanding....and bondo and sanding (so much sanding).
The below pic is where I stand as of tonight. The shape is nearly there, some trimming is also needed at the bottom to make it fit. These things are so heavy it's probably affecting my 0-60 times.

I'm scratching my head about how to cover these things. I'd prefer to cover them in OEM style cloth, but I'm not sure how to go about that.
Has anyone fabric-wrapped something similar? Should I just hand them over to an upholstery shop?

img_20231017_161610-jpg.406438
 
______________________________
From interior to exterior to high performance - everything you need for your Stinger awaits you...
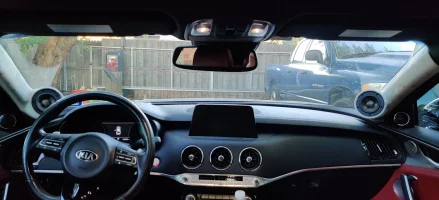
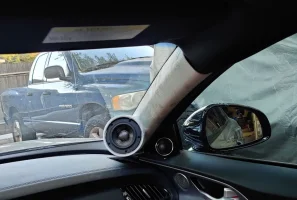
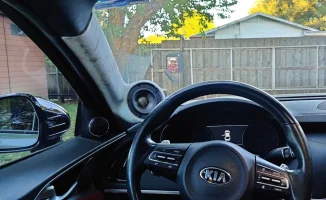
Made some more progress on the pods, managed to get them to fit to the dash and had a chance to mock everything up.

The real MVP here is the Hitachi oscillating tool, so much better than a DA for complex shapes.

IMG_20231019_162621.webp

IMG_20231019_165358.webp

IMG_20231019_161625.webp

IMG_20231019_162633.webp
 
While I sort out the upholstery details for my pillars, I spent the weekend creating a new home for the ARC PSC controller.
I've given up on using Maestro for now. The PSC is nice and the location is fairly ergonomic (for someone with monkey arms like me at least)

First had to remove the center console and run the control wire. This is relatively easy in the Stinger, but there's some pucker factor taking off the top trim, since it seems really east to break.

IMG_20231022_160658.webp

The factory cubby includes aux, USB, cig lighter, and a wireless charger.
The charger sucks and I don't need the lighter port (there's another one in the back of the console), but I do want to keep the aux and USB ports.

I disassembled the console and figured out how to remove the modules.
My plan is to 3D print a new faceplate that can be VHB taped to the OEM mounting surface. This limits permanent modifications and makes the whole thing reversible.

Rectangle Gas Automotive exterior Bumper Composite material


IMG_20231021_090206.webp


Prelim layout. I'll ditch the Qi charger and move the USB/aux jacks to the right side.

Vehicle Motor vehicle Gas Machine Engineering


The final adapter after several tries to get it to fit and allow the overhead door to close. This is probably version 6 or 7, but I'm relatively happy with it.
I will print some side bolsters to trim out the USB jack, and a cover plate for the space where the wireless charger module used to be.

Engineering Wood Office equipment Bumper Automotive tire


Hood Automotive exterior Bumper Vehicle Gas


Here's what she looks like installed. Rotary knob on the left is harder to read the screen this way, but far more ergonomic while driving.


Gear shift Vehicle Car Motor vehicle Steering part


I also took the chance to give my center console plastics the Tesa tape and butyl treatment. The cupholders were especially creaky and now they're totally silent.

If any of you stinger owners reading this have creaky cupholders, I HIGHLY recommend doing this, you don't even have to remove the whole console, just the top trim piece.


Hood Computer hardware Electronic instrument Electronic component Gadget


Lastly, for you 3D printing folks, here's what my PETG center channel adapters look like after 2 years of Texas heat.
PETG warps in a car, especially up on the dash. It's slow, but does happen. These were under a grille so I never noticed.

Now that I have a better printer, I reprinted the adapters in ASA.

Wood Watch Gas Personal protective equipment Auto part
 
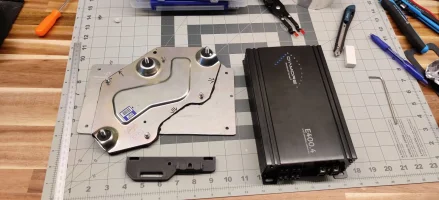
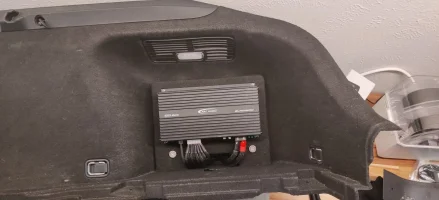
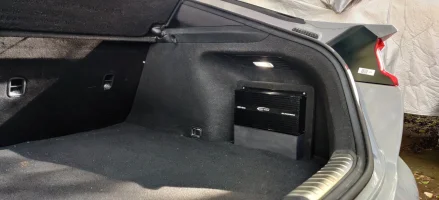
Bought a D'amore E400.4 for the TM8s (200x2 bridged).
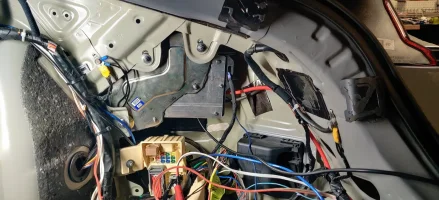
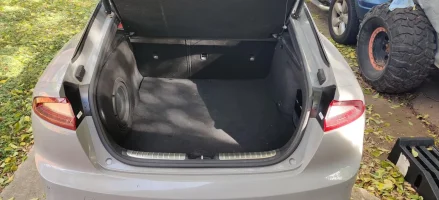
The stinger HU doesn't seem to care if the OEM amp is disconnected, so I decided to mount it in the OEM amp's location behind the wheelwell liner. Hopefully it won't overheat.

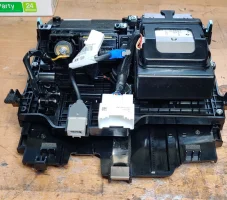
Started by removing the OEM amp mounting plate and then fabbing an adapter plate from some scrap 1/8 aluminum sheet I had lying around.
Put some neoprene foam between the two to avoid rattles.
Also 3D printed a strain relief block out of black ASA

1701818716156.webp


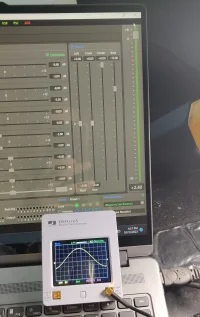
Setting gains before I install it. The gain pots are impossible to reach once it's mounted.

1701818741692.webp


Fits great.
Still lots of wire cleanup to do.

1701818778952.webp


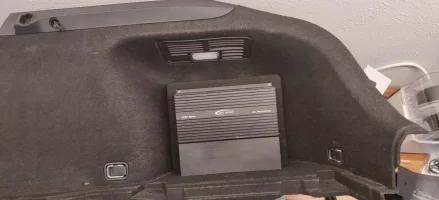
Next I 3D printed a mounting plate for the blackbird. Wrapped it in matching carpet and fastened to the wheelwell liner.
Since the amp is exposed in my hatch area, I don't want cargo inadvertently snagging wires, so I also printed a black ASA wire cover that's held on with magnets.

1701818804676.webp

1701818821761.webp

1701818841843.webp

1701818855636.webp
 
Bought a D'amore E400.4 for the TM8s (200x2 bridged).
The stinger HU doesn't seem to care if the OEM amp is disconnected, so I decided to mount it in the OEM amp's location behind the wheelwell liner. Hopefully it won't overheat.

Started by removing the OEM amp mounting plate and then fabbing an adapter plate from some scrap 1/8 aluminum sheet I had lying around.
Put some neoprene foam between the two to avoid rattles.
Also 3D printed a strain relief block out of black ASA

View attachment 83542


Setting gains before I install it. The gain pots are impossible to reach once it's mounted.

View attachment 83543


Fits great.
Still lots of wire cleanup to do.

View attachment 83544


Next I 3D printed a mounting plate for the blackbird. Wrapped it in matching carpet and fastened to the wheelwell liner.
Since the amp is exposed in my hatch area, I don't want cargo inadvertently snagging wires, so I also printed a black ASA wire cover that's held on with magnets.

View attachment 83545

View attachment 83546

View attachment 83547

View attachment 83548
Sweet like the braded wires shows attention to detail. You can work on mine anytime you want
 
Bought a D'amore E400.4 for the TM8s (200x2 bridged).
The stinger HU doesn't seem to care if the OEM amp is disconnected, so I decided to mount it in the OEM amp's location behind the wheelwell liner. Hopefully it won't overheat.

Started by removing the OEM amp mounting plate and then fabbing an adapter plate from some scrap 1/8 aluminum sheet I had lying around.
Put some neoprene foam between the two to avoid rattles.
Also 3D printed a strain relief block out of black ASA

View attachment 83542


Setting gains before I install it. The gain pots are impossible to reach once it's mounted.

View attachment 83543


Fits great.
Still lots of wire cleanup to do.

View attachment 83544


Next I 3D printed a mounting plate for the blackbird. Wrapped it in matching carpet and fastened to the wheelwell liner.
Since the amp is exposed in my hatch area, I don't want cargo inadvertently snagging wires, so I also printed a black ASA wire cover that's held on with magnets.

View attachment 83545

View attachment 83546

View attachment 83547

View attachment 83548
Would you.be.interested is making the sub box to sell?
 
From interior to exterior to high performance - everything you need for your Stinger awaits you...
And if you weren't terrified before, after reading this thread you should be terrified!

Somehow I missed this thread entirely until this morning. Man, what a journey!

My question is, after all that disassembly - including doors, including boring holes in the floor!? - how do you avoid added noises like squeaks, crackles, pops and snaps, etc.? Drivers already complain about various noises stock. Seems to me that pulling everything apart and refabricating it back together would multiply the incidences of added noises. Then to get rid of them, you would have to pull things apart again and go looking.

For sure lol. Sound dampening helps a lot. There's a guy on reddit, skiz32, they have amazing material: Shop ResoNix Sound Solutions. They have some amazing builds, pricey but 100% worth it.
 
My question is, after all that disassembly - including doors, including boring holes in the floor!? - how do you avoid added noises like squeaks, crackles, pops and snaps, etc.? Drivers already complain about various noises stock. Seems to me that pulling everything apart and refabricating it back together would multiply the incidences of added noises. Then to get rid of them, you would have to pull things apart again and go looking.
A long time ago, when I did a much simpler version of this on a much simpler car, I had a similar problem of reinstalling trim with old nylon clips that tended to break or not hold as well. My unsophisticated solution was to push and tap my way around each of the connection points, checking for flex and loose contact spots.

I also put switches on each of the amp turn-on wires, so I could disable the 4-channel mids/highs and play just the subs, which uncovered a lot of higher pitched rattles and vibrations that the music normally masked. Given @Aarvix's significantly more sophisticated project and attention to detail, I bet it's a combination of careful workmanship and maybe using the sound analyzer to check for rogue frequencies.
 
Last edited:
Given @Aarvix's significantly more sophisticated project and attention to detail, I bet it's a combination of careful workmanship and maybe using the sound analyzer to check for rogue frequencies.
For sure he seems like a sound geek who would go that route. But did his gearhead side encounter the hardware challenges I mentioned? It would be a nice update if he could tell us how his massive disassembly, fabrication, reassembly projects have played out, especially as this has gone on for years. There is nothing else even close on the forum to equal it.
 
From interior to exterior to high performance - everything you need for your Stinger awaits you...
Back
Top