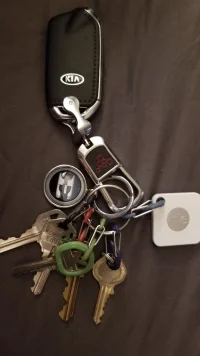
What did you do to your Kia Stinger today?

Awesome, any recommendations when installing? Will be getting my kit in about 2-3weeks. So excited :D

I prefitted and marked where I wanted to drill holes in the splitter. There are square indentations where you drill the holes. Make sure you use the correct drill bit for the bolts (I test drilled holes in plywood). Applied the adhesion promoter, then tape on the underside of the car bumper after cleaning with isopropyl alchohol and removed the plastic backing. Then applied adhesion promoter on the splitter where the tape would contact it, making sure the promoter would not show after install. Then lined up the "points" on the front of the splitter with the "points" on the bottom of the bumper, then folded it up, towards the back of the car into place. Make sure you line it up right the first time. Once the splitter makes contact with the tape, there is no going back. Then drill through the splitter holes into the bottom of the car bumper. The 3 very front holes of the splitter, I used push pins that screwed in. Just take it real slow and prefit repeatedly to ensure you are taping and drilling correctly. Hope this helps. Good luck.
 
Welcome and nice pic!
Can you put your location in your profile please.
My guess would be rhode island....what else is named rhode?!
 
I got a hold of some carbon fiber vinyl silver,,,,,thinking of covering the rear side reflectors.
 
______________________________
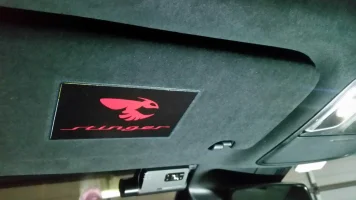
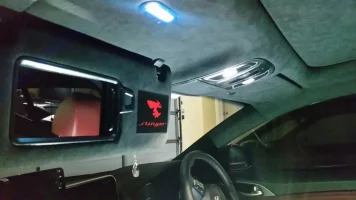
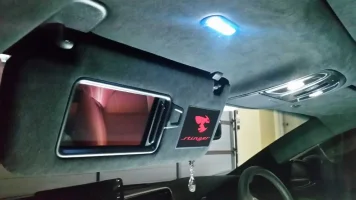
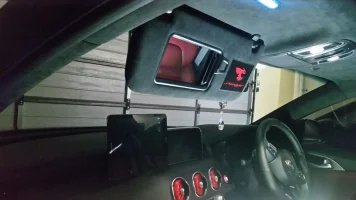
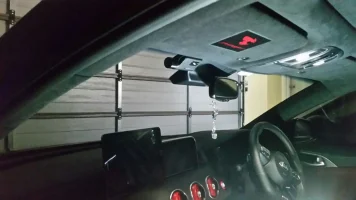
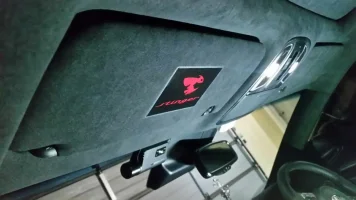
This is what you do when you are bored, Killing time by changing the sun shade visors from those ugly airbag warnings with my own stinger logos, then Wash it and have it ready for the weekend spin around town! ;)


20180915_155459.webp 20180915_155643.webp 20180915_155722.webp 20180915_155807.webp 20180915_155828.webp 20180915_155841.webp
 
Last edited:
From interior to exterior to high performance - everything you need for your Stinger awaits you...
Nice work Mork
 
Last edited:
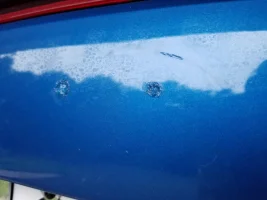
Dropped mine off at a local body shop (with high reviews and higly recommended) to repair the rear badge area. When I took off the KIA badge this is what I found underneath:

20180911_185220 (1).webp

Looks like the line workers applied the badge before the paint was cured. :(
Oddly enough the front badge area was perfect, no issues there.
I filled in the post holes with silicone just to protect it until it went to the body shop.
 
Dropped mine off at a local body shop (with high reviews and higly recommended) to repair the rear badge area. When I took off the KIA badge this is what I found underneath:

View attachment 12624

Looks like the line workers applied the badge before the paint was cured. :(
Oddly enough the front badge area was perfect, no issues there.
I filled in the post holes with silicone just to protect it until it went to the body shop.
That sucks. Hopefully they can fix it easily.
 
______________________________
From interior to exterior to high performance - everything you need for your Stinger awaits you...
Dropped mine off at a local body shop (with high reviews and higly recommended) to repair the rear badge area. When I took off the KIA badge this is what I found underneath:

View attachment 12624

Looks like the line workers applied the badge before the paint was cured. :(
Oddly enough the front badge area was perfect, no issues there.
I filled in the post holes with silicone just to protect it until it went to the body shop.

Mine is worse and I am too embarrassing to post a pic of it. I wish I had taking my time on taking it out, but it is what it is.:ninja:
 
I prefitted and marked where I wanted to drill holes in the splitter. There are square indentations where you drill the holes. Make sure you use the correct drill bit for the bolts (I test drilled holes in plywood). Applied the adhesion promoter, then tape on the underside of the car bumper after cleaning with isopropyl alchohol and removed the plastic backing. Then applied adhesion promoter on the splitter where the tape would contact it, making sure the promoter would not show after install. Then lined up the "points" on the front of the splitter with the "points" on the bottom of the bumper, then folded it up, towards the back of the car into place. Make sure you line it up right the first time. Once the splitter makes contact with the tape, there is no going back. Then drill through the splitter holes into the bottom of the car bumper. The 3 very front holes of the splitter, I used push pins that screwed in. Just take it real slow and prefit repeatedly to ensure you are taping and drilling correctly. Hope this helps. Good luck.
Thanks for the detailed info, did you take off your bumper to do this or can you/did you put it on a ramp or lift? Thanks for the help Rango
 
Mine is worse and I am too embarrassing to post a pic of it. I wish I had taking my time on taking it out, but it is what it is.:ninja:
I screwed up my rear badge area as well.....not a complete catastrophe but I needed the touch up paint anyway.

On a side note ,no pun intended, I took a few vinyl strips of silver carbon fiber and filled in the side reflectors on the rear. I never could figure out the design effect they (kia) were looking for?
 
I took a few vinyl strips of silver carbon fiber and filled in the side reflectors on the rear. I never could figure out the design effect they (kia) were looking for?
Unique look? Sort of a "stinger" line jutting forward. We've called that accent the Stinger's stinger. It is one of the quickest details by which to ID a "Stinger in the wild" if they are passing quickly going the other way. Or if they are passing you going the same way, for that matter. My one and only Stinger sighting thus far was IDed instantly by that "stinger" line.
 
From interior to exterior to high performance - everything you need for your Stinger awaits you...
Your the man that told me where to get them. THANKS! I own them white cards to haaaaa.
 
From interior to exterior to high performance - everything you need for your Stinger awaits you...
Kia Stinger
Back
Top