Snow Performance WMI Stage 2 Review!

With the regular cap on the reservoir do you smell the meth from the cabin. I’m assuming no, but just checking as I see BMS sells a special cap for the reservoir tanks. I assume it would fit our tanks.

I’m looking at a purchasing a 5 gallon pale of meth and then mixing with distilled water for a 80/20 meth/water.
Nope no smells at all
 
got the same wmi kit...enjoyed the thread...are you using heet or 5 gallon methanol cans to mix...ive been mixing 11 bottles of heet to half gallon of distilled water...been working great a year now

No, I use pure VP racing M1 methanol and mix with distilled water on my own. My mix is super precise, though as you already know, I moved to 80/20 from my initial 70/30.

Can the snow performance kit be installed in the engine bay? That would be my preference and then simply use the washer fluid reservoir

Quite simply, no.

With the regular cap on the reservoir do you smell the meth from the cabin. I’m assuming no, but just checking as I see BMS sells a special cap for the reservoir tanks. I assume it would fit our tanks.

I’m looking at a purchasing a 5 gallon pale of meth and then mixing with distilled water for a 80/20 meth/water.

I use the BMS one-way cap as I found that there was noticeable evap as I mostly do NOT drive spirited and also don't get the luxury of parking in a garage. Sometimes I wasn't low, yet, but I would go weeks without ever getting on the throttle, and suddenly get the low warning light. I've already checked and there are no leaks. I switched to the BMS cap, and that hasn't happened at all. HOWEVER, I do notice the valve seems to have a sort of high pressure spring because one time, I was running it hard on my way home, went to get something out of my trunk, and the reservoir was SUCKED IN A BIT (meaning, the sides were concaved!)! It meant that it didn't exceed the one-way valve enough to draw air in, so I can't really tell if that's affecting flow or not, though so far that hasn't seemed to be the case.
 
@ZyroXZ2 I’m purchasing a 5g pale of VP M1 meth. Looking to do 80/20 as well. What are your precise measurements? I was planning on going by weight. X water plus 4x meth to get 80/20. In other words 1lb water + 4lbs meth, for example.
 
______________________________
Well this sucks. I couldn’t figure out where Snow’s MAP sensor connected to the engine bay and I called their support and they said it needs to read a positive boost pressure which makes sense, however my UP IC doesn’t have an 1/8 hole for their MAP sensor so now it has to be removed, drilled and reinstalled. The only potential 1/8 hole is for the vacuum. Unless someone figured out how to use this location for both MAP sensor and vacuum?
 
As a follow-up, what is meant by this?

However, the fact that the vacuum line has to be slipped over the vacuum line coming out of the controller and ziptied over it is a little janky
 
From interior to exterior to high performance - everything you need for your Stinger awaits you...
Looks like the issue here is that most folks received the VC-50 controller and I received the VC-30. Would be interested to hear if anyone received the VC-30 and did you simply attach the MAP sensor to a bung in the charge pipe and since it simply pushes into the bung as it’s not threaded did you zip tie it to the charge pipe to hold it in place.
 
Sorry for the numerous posts. I was thinking my bungs were 1/4 when in reality they are 1/8. This looks to be my best bet, but then the controller will have to be installed in the engine bay.
 
To clear up confusion this created for me and maybe others. If you have this VC controller which is VC-50 you have the Stage 2.5 and not Stage 2. I have a stage 2 and it includes the VC-30 with a MAP sensor that should be connected to a 1/8 NPT bung on the charge pipe to read boost pressure.
 

Attachments

  • 827E52FD-F00A-4F0A-B7E0-1A1B61336E16.webp
    827E52FD-F00A-4F0A-B7E0-1A1B61336E16.webp
    40.1 KB · Views: 0
Here is the Stage 2 with the VC-30 controller.
 

Attachments

  • 255D4C17-61E5-4372-9167-4A39A9E1D084.webp
    255D4C17-61E5-4372-9167-4A39A9E1D084.webp
    54 KB · Views: 1
Yupppp, LAP3 is just sooo painfully slow with getting their WMI kit on the market that I did what any mod-hungry Stinger owner would do: do it my damned self!

Or at least that’s what I thought. I figured even though it’s not designed for the Stinger, I’ll make it work. Many, many iterations of attempted mounting, I got it all up and running about 20 hours later. Yes, I tried in the front fender, and the pump is too large to mount in the corner. Then I tried the BMS WMI mount plate, but the pump base is wider than the one used in the BMS kit and does not clear the area, not even with an elbow at the end. Then I drilled new holes to mount it up and over as well as for the reservoir, but you lose the spare because it can’t clear the spare. That’s when I realized I had to mount the pump as far down as possible with more new drilled holes on the BMS plate and mount the reservoir in the upper trunk itself. Et voila: I lost nothing to installing WMI. I still have my spare, and the reservoir is mounted with 6 push pins (that’s enough strength to hold 3 qts) so that if the fuses have to be accessed, one simply pops the pins out and sets the tank aside. All the lines themselves, as you might guess, run the standard “hidden inside the interior body panels and behind the dash” and get to the engine bay through the firewall grommet. Here are some pics (click for full size) followed by a review from yours truly:

Nozzle Mounted (the guy who TIG welded it got mad at all the rubber coating and went bonkers on clearing it off, lol):


Vacuum Line (SXTH Element vacuum distribution block):


Controller mounted by my knee for easy, on-the-fly changes:


Pump mounted with spare tire showing clearance:


Reservoir mounted with push pins:


If you must know, I guestimated based on my previous dyno run that I would need nozzle #6. That turned out perfectly accurate as the car pulls on the freeway like you wouldn’t believe (literally, I don’t think anyone actually believes what they’re seeing, more on that later, lol). I am at the default starting 5 psi and 15 psi full spray running 50/50. I’m also running their solenoid, but that’s in the trunk, and have no check valve up near the nozzle. Here’s where I provide you with some notes:

  1. The check valve is rated at 35psi, so until the pump is pushing enough pressure, there is no spray at your starting point. Case in point: if you set the starting spray at 5 psi, and you hit 5 psi of boost, the pump is at such a low duty cycle that the check valve doesn’t open up. By the time it does, you’re hitting with more spray like a “burst”, and that causes throttle surge if you’re opening up the taps slowly. I only recommend installing the check valve if your intention is almost always full throttle when you open up the taps, otherwise your starting point isn’t your actual starting point and is likely 1-2 psi higher, and if you decrease the starting point, you may be spraying too much at your “true” starting point. In discussion with Snow Performance tech, they said there are users that, indeed, run only off the solenoid and no check valve.
  2. The solenoid immediately opens on detection of current, and should be, instead, mounted at the front of the vehicle near the nozzle in my scenario. Unfortunately, I had already mounted it in the trunk, and didn’t account for its placement under the hood leaving me no spare length tubing to work with nor a good location for it. The plus is that using purely the solenoid allows a smoother initial ramp up, but the caveat of me having it in the trunk is that the line can be “vacuumed” dry a little by the engine if I don’t drive hard enough to run the WMI every now and then. Try to avoid my mistake and put your solenoid near the nozzle!
  3. I’m mixing my own 50/50 to ensure I’m not getting some watered down BS from an online retailer. LAP3 recommends running 60-80% methanol, and I respectfully disagree with that for both safety reasons and cooling reasons. There’s a lot of discussion here that could be its own thread entirely, so I’ll just let you know my formula for mixing to help you do it easily.
o 5 gallon 50.4/49.6 mix = 45 cups pure methanol to 35 cups distilled water​
o 1 gallon 50.4/49.6 mix = 9 cups pure methanol to 7 cups distilled water​
o Trust my math, there is SOOO much misinformation on mixing methanol online!​
o The slight favor of methanol ratio accounts for natural moisture uptake, so that by the time you have to refill, you’re at 50/50 by the time your reservoir is running low​


So how does it run once I switched the LAP3 Pro Tuner to Mode 3 and ignore their recommended mix? I don’t think you could classify this as a freight train anymore, because it feels more like a muscle car. At 50 MPH, it slams me in my seat hard enough that I can feel the chassis twisting resulting in a little dog tailing. At ½ throttle from a stop or anything below 35MPH, the rear end comes loose and it’s a bit of a fight to keep the car in a straight line. If I floor it as I turn on my blinkers on the highway (yea yea, I do these things at the same time, it’s the result of driving in Cali!), look over and make a steady lane change, I get from 75MPH to a little over 100MPH before I even straighten out. Passing a car at full throttle on the highway makes the car look like it’s parked at a stoplight. The pull is immense and completely unlocks the “top end” power the car lacked from the factory.

Fortunately, if you, too, are waiting on LAP3’s slowass to get WMI on the market, my pics and description here contain everything you need to make use of that Mode 3! When you get it up and running, the words “worth it” come to mind.

Feel free to ask for help: if someone knows what I know now, it would really only take 4-6 hours.

edit: FINAL REVIEW UPDATE:

After plenty of playing around, I can finally give my final thoughts on the Snow Performance WMI kit. One thing I noticed that has me concerned is that the inside of the reservoir's plastic after methanol has drained past it looks "dried out", and now that I've moved to 80% methanol, I do have concerns about degradation of the plastic. Most manufacturers warn using above 50/50 even on their reservoirs, and while Snow says their kits are 100% methanol resistant, the key word is "resistant". Snow even recommends 50/50, so LAP3's tuning for 80% may result in a shortened lifespan of most WMI kits.

Other than that, though, the kit has been working phenomenally. The VC-50 controller may be a gauge, and that may pose a small bit of an installation hurdle inside the car, but it's UI is pretty useful for making on-the-fly adjustments and monitoring how much the system is injecting. Being a boost gauge is an added bonus. However, the fact that the vacuum line has to be slipped over the vacuum line coming out of the controller and ziptied over it is a little janky, to say the least (and I told their tech team that, too!). Basically, you have one hose slipped over the other hose. Why the controller doesn't just have an external fitting is beyond me. The pump itself is rather massive (deceptively so), so keep that in mind if you're going to install this system, and while the 3qt reservoir seems small, it would only really pose an issue under constant WOT conditions (track, drag strip). If you're just giving people a run for their money every now and then, or merging onto the freeway spectacularly, the 3qts will at least last you a whole tank of fuel.

As for how well the car takes WMI, I do want to prepare some of you for the potential "surge" of power you get. When the WMI comes on, the car essentially gets a "boost" in power. Since the small turbos mean early boost, a quick stab of 1/2 throttle to make a maneuver might put you in the 10-12 psi ballpark and up surprising you more than you wanted. This could be dangerous if you were simply trying to get around a car in city traffic, so just be prepared for a much sharper ramp up than without WMI.

I do recommend WMI over an intercooler at this current time simply because the WMI kit weighs overall less and in the case of a trunk mount, mostly added to the back of the car passed the rear axles. It does have more complexity to it, and thus more things that could go wrong compared to an intercooler, but it has more power-making potential than just an intercooler as well.
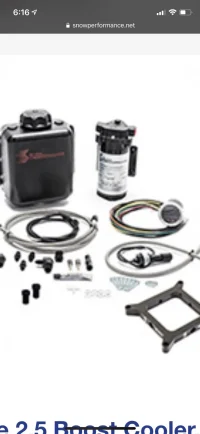
So do you have to purchase distribution block to make this set up work ?
 
From interior to exterior to high performance - everything you need for your Stinger awaits you...
Yupppp, LAP3 is just sooo painfully slow with getting their WMI kit on the market that I did what any mod-hungry Stinger owner would do: do it my damned self!

Or at least that’s what I thought. I figured even though it’s not designed for the Stinger, I’ll make it work. Many, many iterations of attempted mounting, I got it all up and running about 20 hours later. Yes, I tried in the front fender, and the pump is too large to mount in the corner. Then I tried the BMS WMI mount plate, but the pump base is wider than the one used in the BMS kit and does not clear the area, not even with an elbow at the end. Then I drilled new holes to mount it up and over as well as for the reservoir, but you lose the spare because it can’t clear the spare. That’s when I realized I had to mount the pump as far down as possible with more new drilled holes on the BMS plate and mount the reservoir in the upper trunk itself. Et voila: I lost nothing to installing WMI. I still have my spare, and the reservoir is mounted with 6 push pins (that’s enough strength to hold 3 qts) so that if the fuses have to be accessed, one simply pops the pins out and sets the tank aside. All the lines themselves, as you might guess, run the standard “hidden inside the interior body panels and behind the dash” and get to the engine bay through the firewall grommet. Here are some pics (click for full size) followed by a review from yours truly:

Nozzle Mounted (the guy who TIG welded it got mad at all the rubber coating and went bonkers on clearing it off, lol):


Vacuum Line (SXTH Element vacuum distribution block):


Controller mounted by my knee for easy, on-the-fly changes:


Pump mounted with spare tire showing clearance:


Reservoir mounted with push pins:


If you must know, I guestimated based on my previous dyno run that I would need nozzle #6. That turned out perfectly accurate as the car pulls on the freeway like you wouldn’t believe (literally, I don’t think anyone actually believes what they’re seeing, more on that later, lol). I am at the default starting 5 psi and 15 psi full spray running 50/50. I’m also running their solenoid, but that’s in the trunk, and have no check valve up near the nozzle. Here’s where I provide you with some notes:

  1. The check valve is rated at 35psi, so until the pump is pushing enough pressure, there is no spray at your starting point. Case in point: if you set the starting spray at 5 psi, and you hit 5 psi of boost, the pump is at such a low duty cycle that the check valve doesn’t open up. By the time it does, you’re hitting with more spray like a “burst”, and that causes throttle surge if you’re opening up the taps slowly. I only recommend installing the check valve if your intention is almost always full throttle when you open up the taps, otherwise your starting point isn’t your actual starting point and is likely 1-2 psi higher, and if you decrease the starting point, you may be spraying too much at your “true” starting point. In discussion with Snow Performance tech, they said there are users that, indeed, run only off the solenoid and no check valve.
  2. The solenoid immediately opens on detection of current, and should be, instead, mounted at the front of the vehicle near the nozzle in my scenario. Unfortunately, I had already mounted it in the trunk, and didn’t account for its placement under the hood leaving me no spare length tubing to work with nor a good location for it. The plus is that using purely the solenoid allows a smoother initial ramp up, but the caveat of me having it in the trunk is that the line can be “vacuumed” dry a little by the engine if I don’t drive hard enough to run the WMI every now and then. Try to avoid my mistake and put your solenoid near the nozzle!
  3. I’m mixing my own 50/50 to ensure I’m not getting some watered down BS from an online retailer. LAP3 recommends running 60-80% methanol, and I respectfully disagree with that for both safety reasons and cooling reasons. There’s a lot of discussion here that could be its own thread entirely, so I’ll just let you know my formula for mixing to help you do it easily.
o 5 gallon 50.4/49.6 mix = 45 cups pure methanol to 35 cups distilled water​
o 1 gallon 50.4/49.6 mix = 9 cups pure methanol to 7 cups distilled water​
o Trust my math, there is SOOO much misinformation on mixing methanol online!​
o The slight favor of methanol ratio accounts for natural moisture uptake, so that by the time you have to refill, you’re at 50/50 by the time your reservoir is running low​


So how does it run once I switched the LAP3 Pro Tuner to Mode 3 and ignore their recommended mix? I don’t think you could classify this as a freight train anymore, because it feels more like a muscle car. At 50 MPH, it slams me in my seat hard enough that I can feel the chassis twisting resulting in a little dog tailing. At ½ throttle from a stop or anything below 35MPH, the rear end comes loose and it’s a bit of a fight to keep the car in a straight line. If I floor it as I turn on my blinkers on the highway (yea yea, I do these things at the same time, it’s the result of driving in Cali!), look over and make a steady lane change, I get from 75MPH to a little over 100MPH before I even straighten out. Passing a car at full throttle on the highway makes the car look like it’s parked at a stoplight. The pull is immense and completely unlocks the “top end” power the car lacked from the factory.

Fortunately, if you, too, are waiting on LAP3’s slowass to get WMI on the market, my pics and description here contain everything you need to make use of that Mode 3! When you get it up and running, the words “worth it” come to mind.

Feel free to ask for help: if someone knows what I know now, it would really only take 4-6 hours.

edit: FINAL REVIEW UPDATE:

After plenty of playing around, I can finally give my final thoughts on the Snow Performance WMI kit. One thing I noticed that has me concerned is that the inside of the reservoir's plastic after methanol has drained past it looks "dried out", and now that I've moved to 80% methanol, I do have concerns about degradation of the plastic. Most manufacturers warn using above 50/50 even on their reservoirs, and while Snow says their kits are 100% methanol resistant, the key word is "resistant". Snow even recommends 50/50, so LAP3's tuning for 80% may result in a shortened lifespan of most WMI kits.

Other than that, though, the kit has been working phenomenally. The VC-50 controller may be a gauge, and that may pose a small bit of an installation hurdle inside the car, but it's UI is pretty useful for making on-the-fly adjustments and monitoring how much the system is injecting. Being a boost gauge is an added bonus. However, the fact that the vacuum line has to be slipped over the vacuum line coming out of the controller and ziptied over it is a little janky, to say the least (and I told their tech team that, too!). Basically, you have one hose slipped over the other hose. Why the controller doesn't just have an external fitting is beyond me. The pump itself is rather massive (deceptively so), so keep that in mind if you're going to install this system, and while the 3qt reservoir seems small, it would only really pose an issue under constant WOT conditions (track, drag strip). If you're just giving people a run for their money every now and then, or merging onto the freeway spectacularly, the 3qts will at least last you a whole tank of fuel.

As for how well the car takes WMI, I do want to prepare some of you for the potential "surge" of power you get. When the WMI comes on, the car essentially gets a "boost" in power. Since the small turbos mean early boost, a quick stab of 1/2 throttle to make a maneuver might put you in the 10-12 psi ballpark and up surprising you more than you wanted. This could be dangerous if you were simply trying to get around a car in city traffic, so just be prepared for a much sharper ramp up than without WMI.

I do recommend WMI over an intercooler at this current time simply because the WMI kit weighs overall less and in the case of a trunk mount, mostly added to the back of the car passed the rear axles. It does have more complexity to it, and thus more things that could go wrong compared to an intercooler, but it has more power-making potential than just an intercooler as well.
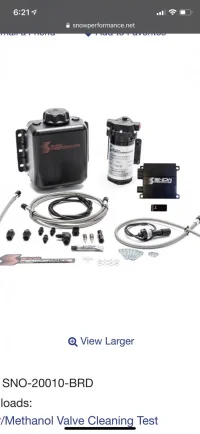
Just had my snow performance 2.5 kit installed noticed my fuel trim and afr are exactly the same did you see same results?
 
Back
Top