corradoMR2
Active Member
If you have a ticking/tapping noise, see this thread here.
This DIY below is to address a different creaking noise from the door panels.
Symptom
- Pressing firmly in the door panel either above, on, or below the armrest creates a creaking/squeaking noise. Issue can be reproducible on both front doors, possibly the rear ones too.
- While driving up or down a driveway ramp, when the car's body and door can flex slightly, the noise can occur.
- While driving/braking creating similar body motions, the noise can occur.
Issue/Root Cause
- space between subpanels allows for motion
- incomplete bonding of the sub-panels of the door panel.
Fix
- Add a quality cement glue to all the joints on the underside.
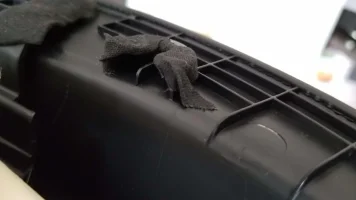
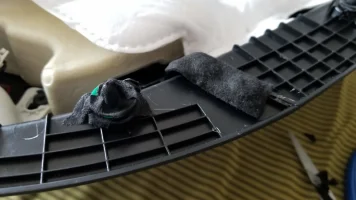
- Add felt tape (hockey tape) to the clips.
DIY Complexity
Beginner - Moderate - Advanced - Go to Kia
Scope
Applies to the front doors (similar procedure can apply to rear though it was not attempted/done)
Tools
- Plastic trim/prying tools (Ebay)
- Quality Household Cement glue (i.e. Elmers)
- Philips screw driver
- hockey (felt) tape
Step 1: Remove Door Frame Trim
- See Door Frame Ticking DIY here
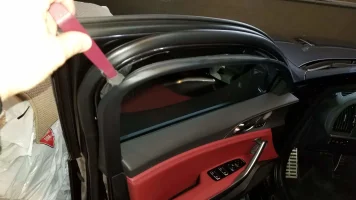
Step 2: Remove Door Panel
- Remove the covers and the three screws.
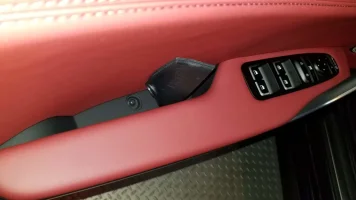
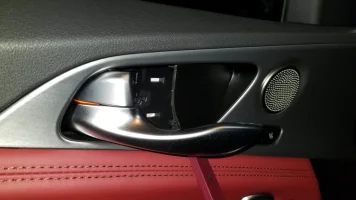
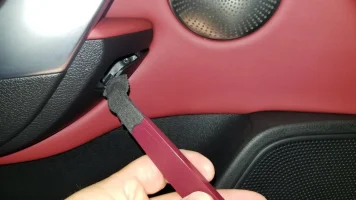
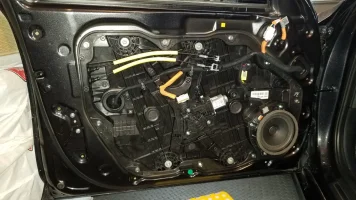
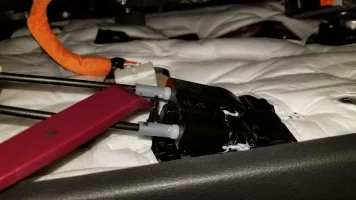
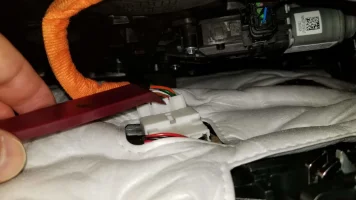
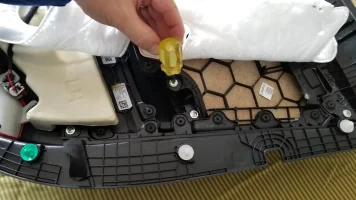
- Pry outwards along the entire perimeter of the door panel beside each clip (11 of them). (To find the clips, slide the tool sideways underneath the door panel until it stops). To help you locate the spots, also see further pics below on the inside panel - you will see the location of the clips. You will need some force (at least the first one or two spots) to pop out the panel. NOTE: Near the small speaker, there is one clip.
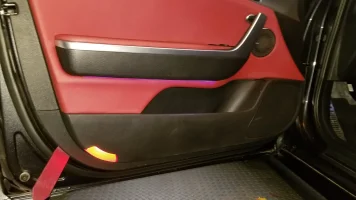
Pull and lift the door panel upwards off the metal door sill and release the clips for the door handle/lock and speaker
Step 3: Apply cement and felt tape
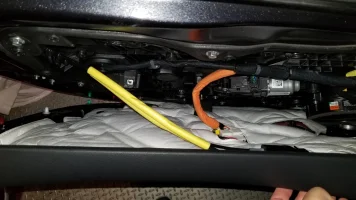
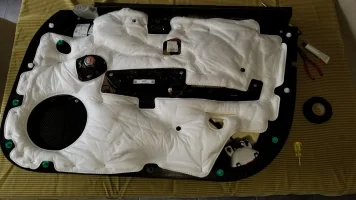
- You will need to carefully pull out most of the padding (you will put cement glue on the same contact spots when re-assembling)
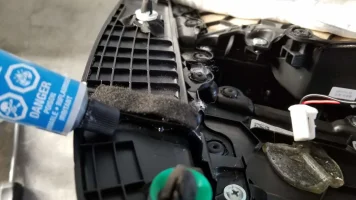
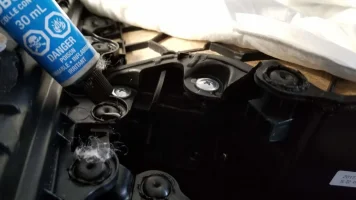
- Apply cement along all welded joints (and screws after tightening). This is the key step so ensure you apply glue in every seam/joint you see from the lower, mid, and upper sections of the panel. The creaking stems from one or more of these joints/interfaces.
- Apply felt tape on the clips
- Tighten each panel screw (mine required at least a quarter to half turn)
- Place the panel upright for a few minutes immediately after applying the cement, then switch it upside down too to ensure the cement crawls in the spacing.
- Let dry a few hours
Step 4: Re-assemble
- reverse the above removal steps.
- To avoid the cement glue odor in your car, you may want to let the panel dry overnight.
This DIY below is to address a different creaking noise from the door panels.
Symptom
- Pressing firmly in the door panel either above, on, or below the armrest creates a creaking/squeaking noise. Issue can be reproducible on both front doors, possibly the rear ones too.
- While driving up or down a driveway ramp, when the car's body and door can flex slightly, the noise can occur.
- While driving/braking creating similar body motions, the noise can occur.
Issue/Root Cause
- space between subpanels allows for motion
- incomplete bonding of the sub-panels of the door panel.
Fix
- Add a quality cement glue to all the joints on the underside.
- Add felt tape (hockey tape) to the clips.
DIY Complexity
Beginner - Moderate - Advanced - Go to Kia
Scope
Applies to the front doors (similar procedure can apply to rear though it was not attempted/done)
Tools
- Plastic trim/prying tools (Ebay)
- Quality Household Cement glue (i.e. Elmers)
- Philips screw driver
- hockey (felt) tape
Step 1: Remove Door Frame Trim
- See Door Frame Ticking DIY here

Step 2: Remove Door Panel
- Remove the covers and the three screws.


- Pry outwards along the entire perimeter of the door panel beside each clip (11 of them). (To find the clips, slide the tool sideways underneath the door panel until it stops). To help you locate the spots, also see further pics below on the inside panel - you will see the location of the clips. You will need some force (at least the first one or two spots) to pop out the panel. NOTE: Near the small speaker, there is one clip.

Pull and lift the door panel upwards off the metal door sill and release the clips for the door handle/lock and speaker


Step 3: Apply cement and felt tape
- You will need to carefully pull out most of the padding (you will put cement glue on the same contact spots when re-assembling)
- Apply cement along all welded joints (and screws after tightening). This is the key step so ensure you apply glue in every seam/joint you see from the lower, mid, and upper sections of the panel. The creaking stems from one or more of these joints/interfaces.
- Apply felt tape on the clips
- Tighten each panel screw (mine required at least a quarter to half turn)
- Place the panel upright for a few minutes immediately after applying the cement, then switch it upside down too to ensure the cement crawls in the spacing.
- Let dry a few hours


Step 4: Re-assemble
- reverse the above removal steps.
- To avoid the cement glue odor in your car, you may want to let the panel dry overnight.
Last edited:


