Kevin Arnold
Newish Member
- Joined
- Dec 6, 2019
- Messages
- 14
- Reaction score
- 27
- Points
- 3
Today I received my center caps, hood badge, and "Stinger" script for the trunk. Kits like this are on eBay, and most (like mine), come from Korea. Let me start by saying I didn't necessarily do this out of shame for the brand. Rather, so many people are not familiar with the Stinger, I thought it might be fun to make it a little more mysterious by removing the familiar KIA badge and replacing it with the Korean market version.
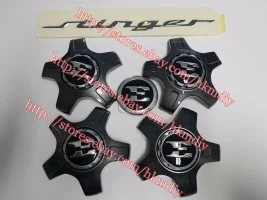
The center caps are easy and these fit my 18" wheels, as well as they, also fit the 19" wheels also.
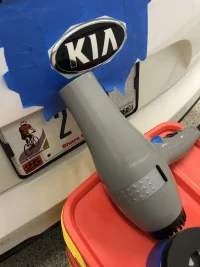
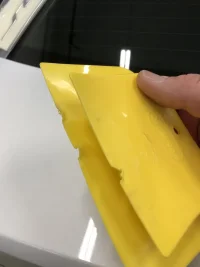
The hood badge came off pretty easily using two Dynatron 358 Spreaders from Amazon and my wife's 2000W hairdryer. The painter's tape helped avoid any excess scratching.
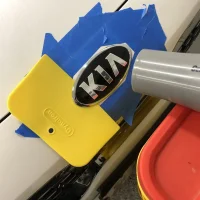
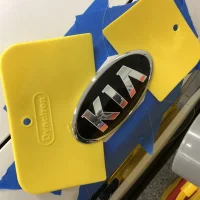
After about 3 minutes of heating, it came off pretty easily.
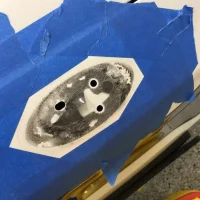
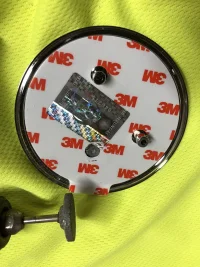
I removed the one locating pin using a Dremel tool and it fit perfectly. I used an old microfiber towel and Goo Gone to remove the residue from the old tape. That is the hardest part of this whole job. Lots of Goo Gine and LOTS of rubbing and picking. I found just rubbing with the microfiber towel helped remove a lot of the residue.
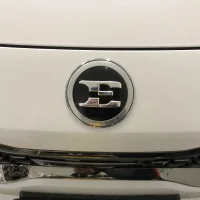
The rear badge is much the same process.
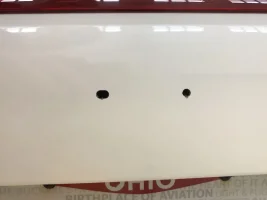
I used some white silicone to fill the holes.
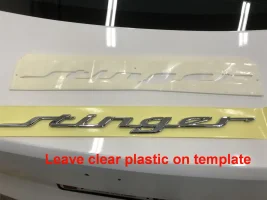
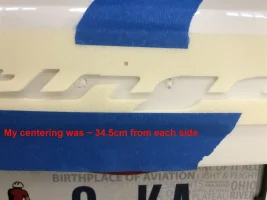
The Stinger script comes with a foam template. DO NOT remove the clear plastic from this until you have the template centered. Also note the badge is in TWO PIECES, so the template is vital to keeping both halves aligned. The "n" and the "g" will mostly totally cover the holes. Take your time centering the template with the chrome script removed. Be careful not to remove the backing yet from the Stinger script as well. Once you have the template centered, tape it in place and remove the backing from the Stinger script. Fit the emblem into the template as the guide.
Remove the foam template and press firmly to set the adhesive. Enjoys your hard work!
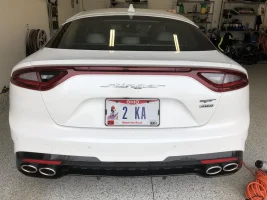
The small "Stinger" script comes off very easily and there are no guide pins to cover up.
Overall this took about 1.5 hours to do, with most of the time used to remove the old 3M tape residue. The prying with the spreaders pretty well chewed them up, but they should last you through the whole job.

The center caps are easy and these fit my 18" wheels, as well as they, also fit the 19" wheels also.
The hood badge came off pretty easily using two Dynatron 358 Spreaders from Amazon and my wife's 2000W hairdryer. The painter's tape helped avoid any excess scratching.


After about 3 minutes of heating, it came off pretty easily.

I removed the one locating pin using a Dremel tool and it fit perfectly. I used an old microfiber towel and Goo Gone to remove the residue from the old tape. That is the hardest part of this whole job. Lots of Goo Gine and LOTS of rubbing and picking. I found just rubbing with the microfiber towel helped remove a lot of the residue.


The rear badge is much the same process.


I used some white silicone to fill the holes.
The Stinger script comes with a foam template. DO NOT remove the clear plastic from this until you have the template centered. Also note the badge is in TWO PIECES, so the template is vital to keeping both halves aligned. The "n" and the "g" will mostly totally cover the holes. Take your time centering the template with the chrome script removed. Be careful not to remove the backing yet from the Stinger script as well. Once you have the template centered, tape it in place and remove the backing from the Stinger script. Fit the emblem into the template as the guide.
Remove the foam template and press firmly to set the adhesive. Enjoys your hard work!


The small "Stinger" script comes off very easily and there are no guide pins to cover up.
Overall this took about 1.5 hours to do, with most of the time used to remove the old 3M tape residue. The prying with the spreaders pretty well chewed them up, but they should last you through the whole job.

Last edited:


