ThunderBoy724
Member
A couple of months ago I took the centre piece out of my star shaped caps and attached it to the wheel with a piece of aluminum. It was a bit of a back alley job but it looked cool so I went with it. 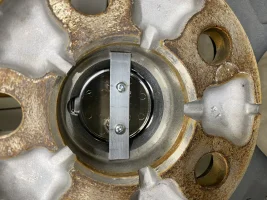
But then I got new tires and at the tire shop they said they had to remove the caps to balance the tires and they gave all the parts back to me in a bag. so obviously if you ever have to have a tire serviced or replaced this wasn't a great idea. And then I started to wonder if you could modify the existing cap to fit the snap in piece to the outer piece and have a nice factory style snap in cap. Since I have 3 sets of these things I figured I had nothing to lose by trying. So here's how I did it.
First I disassembled the cap and snapped off the tabs that screw it onto the outer painted cover. If I was to do this again I would not break these off first since they make sharp edges and you will need something to grip on to drill out the two holes.
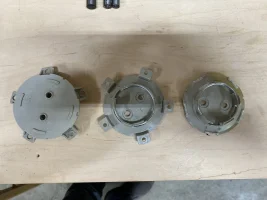
Next step is to drill out the holes. I found the best way for me was to hold it by hand and with the drill bit in the drill just turn it and it will shave the plastic out of the hole. I did it in four steps going up 1/8" at a time. Final size is 1/2" hole.
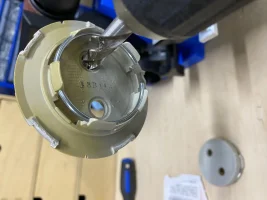
Next I cut the outer ring off using a Dremel. A band saw would have made short work of this but I used what I had.
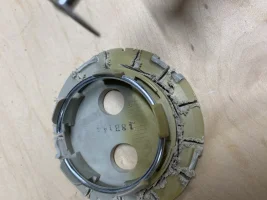
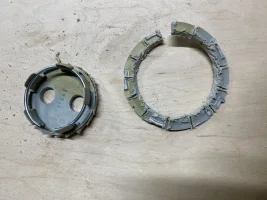
Next came the sanding. Lots of sanding. I used a bench top belt sander. Be patient and take your time. Too much sanding will start to melt the plastic so be careful. You have to make it about half as thick as it is and also sand down the edges so that it fits inside of the cap. Keep sanding a little at a time and keep checking the fit until it sits flush inside the cap.
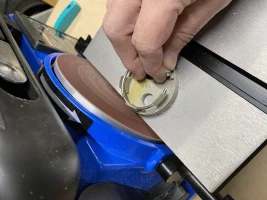
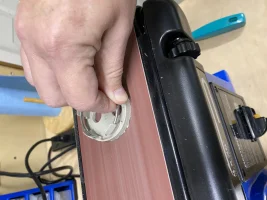
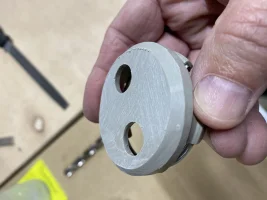
When you're done sanding and happy with the fit you can also shave off the tabs around the inner ring to get the cap to sit flush with the rim.
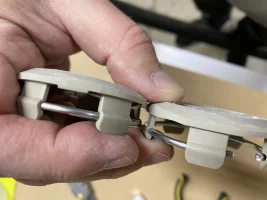
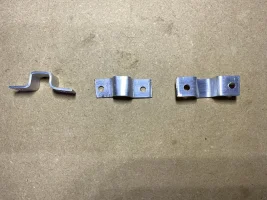
Once I was happy with the fit I super glued them in. However I realized too late that this wouldn't stand up over time because water can break down super glue. So I made some small clips out of 1/8" aluminum and bent them to hold the clip and fit over the screw holes. I thought about cutting them down but the threaded part of the cap is at the end and it is hollow inside.
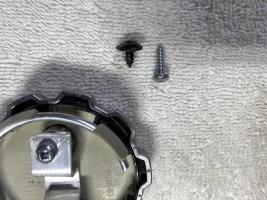
I used a 1/2" #6 wood screw instead of the original because with the thickness of the metal there isn't much thread left on the screw to bite into the plastic.
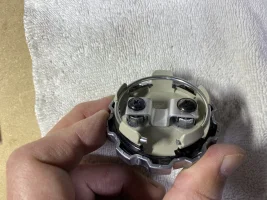
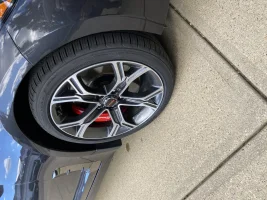
It tool me the weekend to do all four caps but there was a lot of experimentation. If I was to do it again it would take about an hour per cap.
I'm pretty pleased with the end result. Now I have snap in centre caps and I can put whatever overlay I want on it. I think I will make another set and put my metal "E" logo caps on because the overlays don't hold up with the winter salt and snow.
Feel free to ask and questions or if you have some better ideas by all means I'd love to hear them.

But then I got new tires and at the tire shop they said they had to remove the caps to balance the tires and they gave all the parts back to me in a bag. so obviously if you ever have to have a tire serviced or replaced this wasn't a great idea. And then I started to wonder if you could modify the existing cap to fit the snap in piece to the outer piece and have a nice factory style snap in cap. Since I have 3 sets of these things I figured I had nothing to lose by trying. So here's how I did it.
First I disassembled the cap and snapped off the tabs that screw it onto the outer painted cover. If I was to do this again I would not break these off first since they make sharp edges and you will need something to grip on to drill out the two holes.

Next step is to drill out the holes. I found the best way for me was to hold it by hand and with the drill bit in the drill just turn it and it will shave the plastic out of the hole. I did it in four steps going up 1/8" at a time. Final size is 1/2" hole.

Next I cut the outer ring off using a Dremel. A band saw would have made short work of this but I used what I had.


Next came the sanding. Lots of sanding. I used a bench top belt sander. Be patient and take your time. Too much sanding will start to melt the plastic so be careful. You have to make it about half as thick as it is and also sand down the edges so that it fits inside of the cap. Keep sanding a little at a time and keep checking the fit until it sits flush inside the cap.


When you're done sanding and happy with the fit you can also shave off the tabs around the inner ring to get the cap to sit flush with the rim.

Once I was happy with the fit I super glued them in. However I realized too late that this wouldn't stand up over time because water can break down super glue. So I made some small clips out of 1/8" aluminum and bent them to hold the clip and fit over the screw holes. I thought about cutting them down but the threaded part of the cap is at the end and it is hollow inside.

I used a 1/2" #6 wood screw instead of the original because with the thickness of the metal there isn't much thread left on the screw to bite into the plastic.


It tool me the weekend to do all four caps but there was a lot of experimentation. If I was to do it again it would take about an hour per cap.
I'm pretty pleased with the end result. Now I have snap in centre caps and I can put whatever overlay I want on it. I think I will make another set and put my metal "E" logo caps on because the overlays don't hold up with the winter salt and snow.
Feel free to ask and questions or if you have some better ideas by all means I'd love to hear them.


